There are a few concepts in CSS layout that can really enhance your CSS game once you understand them. This article is about the Block Formatting Context (BFC). You may never have heard of this term, but if you have ever made a layout with CSS, you probably know what it is. Understanding what a BFC is, why it works, and how to create one is useful and can help you to understand how layout works in CSS.
In this article, I’ll explain what a BFC is through examples which are likely to be familiar to you. I’ll then show you a new value of display, that really only makes sense once you understand what a BFC is and why you might need one.
What Is A BFC?
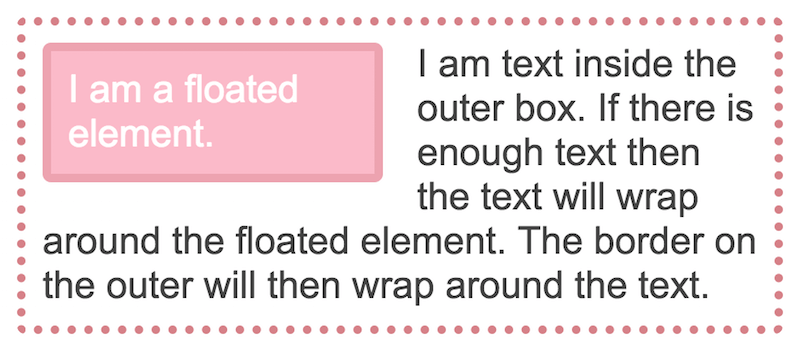
How a Block Formatting Context (BFC) behaves is easiest to understand with a simple float example. In the below example I have a box that contains an image that has been floated left and some text. If we have a good amount of text it wraps around the floated image and the border then runs around the whole lot.
<div class="outer">
      <div class="float">I am a floated element.</div>
      I am text inside the outer box.
    </div>
.outer {
      border: 5px dotted rgb(214,129,137);
      border-radius: 5px;
      width: 450px;
      padding: 10px;
      margin-bottom: 40px;
    }

    .float {
      padding: 10px;
      border: 5px solid rgba(214,129,137,.4);
      border-radius: 5px;
      background-color: rgba(233,78,119,.4);
      color: #fff;
      float: left;
      width: 200px;
      margin: 0 20px 0 0;
    }

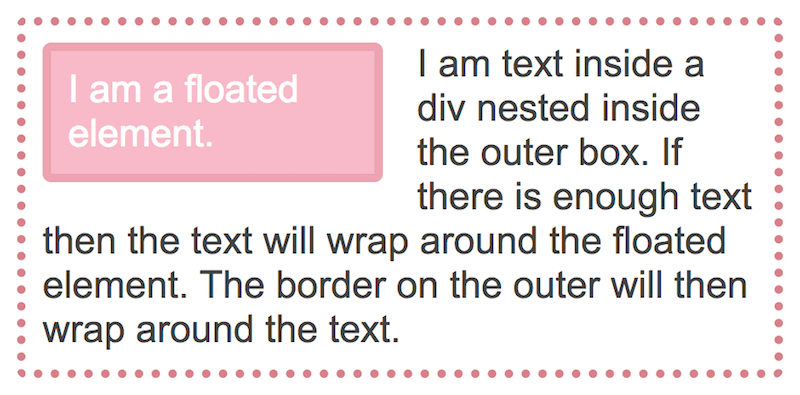
If I remove some of the text, then there is not enough to wrap around the image, and because the float is taken out of document flow, the border rises up and runs underneath the image to the height of the text.

This happens because when we float an element, the box that the text is in remains the same width, what is shortened to make space for the floated element are the line boxes of the text. This is why backgrounds and borders will appear to run behind our float.
There are two ways in which we ordinarily fix this layout problem. One would be to use a clearfix hack, which has the effect of inserting an element below the text and image and setting it to clear both. The other method is to use the overflow property, with a value other than the default of visible.
.outer {
      overflow: auto;
    }

overflow: auto causes the box to contain the float. (Large preview)See the Pen Floats and the BFC by rachelandrew (@rachelandrew) on CodePen.
The reason overflow works in this way is that using any value other than the initial value of visible creates a Block Formatting Context, and one of the features of a BFC is that it contains floats.
A BFC Is A Mini Layout In Your Layout
You can think of a BFC as like a mini layout inside your page. Once an element creates a BFC, everything is contained inside it. As we have seen, this includes floated elements which no longer poke out of the bottom of the box. The BFC also causes some other useful behavior.
The BFC prevents margins collapsing
Understanding margin collapsing is another underrated CSS skill. In this next example, I have a div with a background color of grey.
This div has two paragraphs inside it. The outer div element has a margin-bottom of 40 pixels; the paragraphs also have a top and bottom margin of 20 pixels.
.outer {
       background-color: #ccc;
      margin: 0 0 40px 0;
    }

    p {
      padding: 0;
      margin: 20px 0 20px 0;
      background-color: rgb(233,78,119);
      color: #fff;
    }
As there is nothing between the margin of the p element and the margin on the outer div, the two will collapse and so the paragraphs end up flush with the top and bottom of the box. We don’t see any grey above and below the paragraphs.

If we make the box a BFC however, it now contains the paragraphs and their margins, so they don’t collapse and we can see the grey background of the container behind the margin.
.outer {
       background-color: #ccc;
      margin: 0 0 40px 0;
      overflow: auto;
    }

See the Pen BFC Margin collapsing by rachelandrew (@rachelandrew) on CodePen.
Once again the BFC is doing this job of containing the things inside it, stopping them from escaping and poking out of the box.
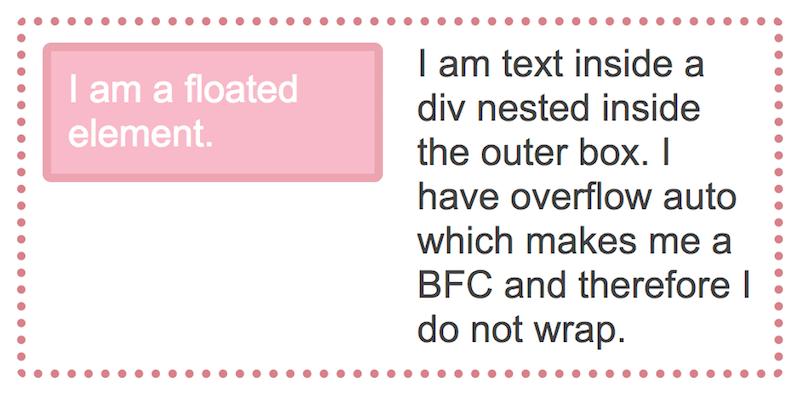
A BFC stops content wrapping floats. You will also be familiar with this behavior of a BFC, as it is how any column type layout using floats works. If an item creates a BFC, then that item will not wrap any floats. In the following example I have markup like this:
<div class="outer">
      <div class="float">I am a floated element.</div>
      <div class="text">I am text</div>
    </div>
The item with a class of float is floated left and so the text in the div which comes after it wraps around the float.

I can prevent that wrapping behavior by making the div that wraps the text a BFC.
.text {
      overflow: auto;
    }

This is essentially the way we can create a floated layout with several columns. Floating an item also creates a BFC for that item, and so our columns don’t attempt to wrap around each other if one on the right is taller than one on the left.
See the Pen A BFC preventing wrapping of floats. by rachelandrew (@rachelandrew) on CodePen.
What Else Creates A BFC?
In addition to using overflow to create a BFC, some other CSS properties create a BFC. As we have seen, floating an element creates a BFC. So your floated item will contain anything inside it.
Using position: absolute or position: fixed on an element.
Using display: inline-block, display: table-cell or display: table-caption. The table-cell and table-captions are the default for these HTML elements, so if you have a data table for example, each cell will create a BFC.
Using column-span: all, which is used to span the columns of a multi-column layout. Flex and Grid items also create something like a BFC, except they are described as a Flex Formatting Context and Grid Formatting Context respectively. This reflects the type of layout each is participating in. A Block Formatting Context indicates that the item is participating in Block Layout, a Flex Formatting Context means the item is participating in Flex layout. In practice, the result is the same, floats are contained and margins do not collapse.
The New Way To Create A BFC
There are two issues with using overflow, or some other method to create a BFC. The first is that these methods have side effects based on what they were really designed to do. The overflow method creates a BFC and contains floats, however in certain scenarios you might find that you get an unwanted scrollbar, or that shadows are clipped. This is due to the fact that the overflow property is designed to allow you to tell the browser what to do in an overflow situation - cause a scrollbar or clip the content. The browser is doing exactly what you told it to do!
Even in situations where you don’t get any unwanted side effects, using overflow is potentially confusing to another developer. Why is overflow set to auto or scroll? What was the original developer’s intention there? Did they want scrollbars on this component?
What would be useful would be a method of creating a BFC that is otherwise inert, causing no other behavior but to create that mini layout, and the ability for things to happen inside it safely. That method would not cause any unexpected issues and also allow clarity in terms of what the developer intended. The CSS Working Group thought that might be pretty handy too, and so we have a new value of the display property - flow-root.
You would use display: flow-root in any of the situations in this article where creating a new BFC would be advantageous - to contain floats, to prevent margins collapsing, or to prevent an item wrapping a float.
You can see all of these in the CodePen below if you have a browser that supports display: flow-root such as up to date Firefox or Chrome.
See the Pen Using display: flow-root for common tasks by rachelandrew (@rachelandrew) on CodePen.
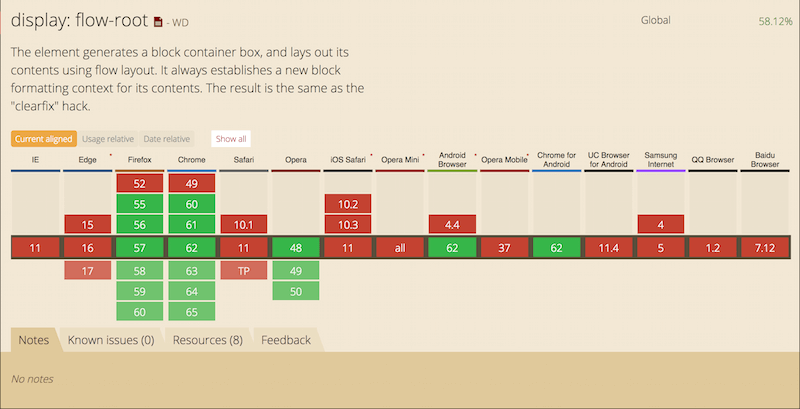
Browser support for display: flow-root

Browser support for this value is limited, but increasing and if you think it would be handy, do go and vote for it in Edge. However, even if you aren’t able to use the handy flow-root feature in your code right now, you now understand what a BFC is, and what you are doing when you use overflow or some other method to contain floats. Understanding the fact that a BFC will stop an item wrapping a float, for example, is pretty useful if you want to create a fallback for a flex or grid layout in non-supporting browsers.
You also understand something that is pretty fundamental in terms of how web pages are laid out by the browser. While they seem inconsequential on their own, it is these little bits of knowledge that can speed up the time it takes to create and debug CSS layouts.
 (yk, il)


