WordPress shortcodes were introduced in version 2.5 and since then have proved to be one of the most useful features. The average user acting as editor has the ability to publish dynamic content using macros, without the need for programming skills.
When a shortcode is inserted in a WordPress post or page, it is replaced with some other content. In other words, we instruct WordPress to find the macro that is in square brackets ([]) and replace it with the appropriate dynamic content, which is produced by a PHP function.
Further Reading on SmashingMag:
- WordPress Functions To Make Blogging Easier
- Mastering WordPress Shortcodes
- Making A WordPress Plugin That Uses Service APIs
- Responsive Images Now Landed In WordPress Core
The usage is pretty simple. Let’s say we want to show the most recent posts in a given post. We could use something like this:
[recent-posts]For a more advanced shortcode, we could set the number of posts to display by setting a parameter:
[recent-posts posts="5"]Going one step further, we could set a heading for the list of recent posts:
[recent-posts posts="5"]Posts Heading[/recent-posts]Simple Shortcode
In the first part of this tutorial, we will create the code for this simple shortcode:
[recent-posts]The creation process is simple and does not require any advanced PHP knowledge. The basic steps are:
- Create the function, which will be called by WordPress when it finds a shortcode.
- Register the shortcode by setting a unique name.
- Tie the registration function to a WordPress action.
All codes in this tutorial can be placed in functions.php or in a seperate PHP file that will be included in functions.php.
Create the Callback Function
When a shortcode is found, it is replaced by some piece of code, which is the callback function. So, let’s create a function that fetches recent posts from the database.
function recent_posts_function() {
   query_posts(array('orderby' => 'date', 'order' => 'DESC' , 'showposts' => 1));
   if (have_posts()) :
      while (have_posts()) : the_post();
         $return_string = '<a href="'.get_permalink().'">'.get_the_title().'</a>';
      endwhile;
   endif;
   wp_reset_query();
   return $return_string;
}
As shown, we’re querying the database to get the latest post and return a string with a link to it. Ιt is worth noting that the callback function does not print anything, but rather returns a string.
Register the Shortcode
Now, we tell WordPress that this function is a shortcode:
function register_shortcodes(){
   add_shortcode('recent-posts', 'recent_posts_function');
}
Ιf a shortcode of [recent-posts] is found in a post’s content, then recent_posts_function() is called automatically. We should ensure that the shortocode’s name is unique in order to avoid conflicts.
Hook Into WordPress
In order to execute our register_shortcodes() function, we will tie it to WordPress’ initialization action:
add_action( 'init', 'register_shortcodes');Test the Shortcode
Our simple shortcode is ready, and the next step is testing that it operates properly. Let’s create a new post (or open an existing one) and put the following line somewhere in the content:
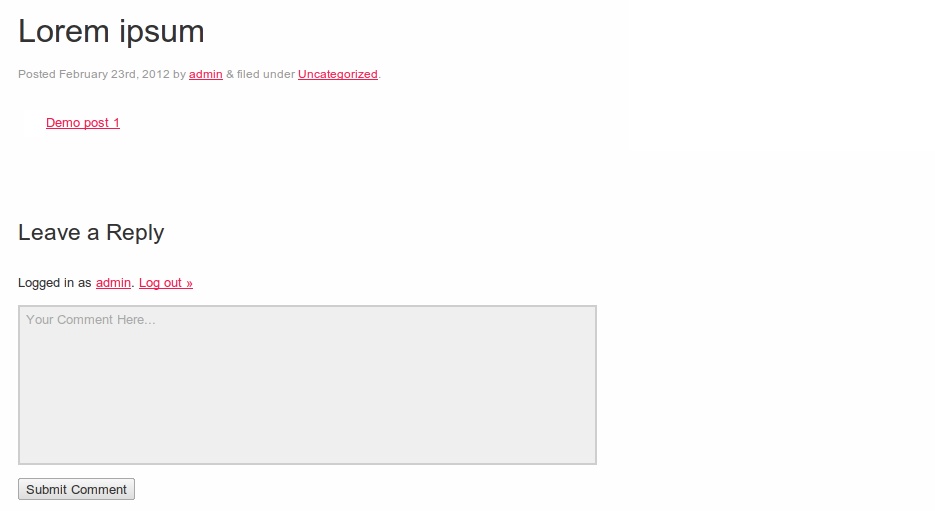
[recent-posts]Publish the post, and viewing it in a browser, you should see a link to the most recent post on your blog, as shown in this screenshot:
Simple shortcode
Advanced Shortcode
Shortcode Parameters
Shortcodes are flexible because they allow us to add parameteres in order to make them more functional. Let’s say we want to display a certain number of recent posts. To do this, we need to add an extra option to our shortcode that specifies how many recent posts to show.
We have to use two functions. The first one is WordPress’ built-in shortcode_atts() function, which combines user shortcode attributes with native attributes and fills in the defaults where needed. The second function is the extract() PHP function, which does what its name suggests: it extracts the shortcode attributes.
Extending our callback function, we add an argument, which is an array of attributes from which we extract the parameter for the number of posts. Then we query the database to get the desired number of posts and create an HTML list to show them.
function recent_posts_function($atts){
   extract(shortcode_atts(array(
      'posts' => 1,
   ), $atts));

   $return_string = '<ul>';
   query_posts(array('orderby' => 'date', 'order' => 'DESC' , 'showposts' => $posts));
   if (have_posts()) :
      while (have_posts()) : the_post();
         $return_string .= '<li><a href="'.get_permalink().'">'.get_the_title().'</a></li>';
      endwhile;
   endif;
   $return_string .= '</ul>';

   wp_reset_query();
   return $return_string;
}
If the user skips the option, 1 is the default value. In the same way, we can add more attributes, enabling the shortcodes to accept multiple parameteres. Thanks to this enhanced function, we can set how many posts to show:
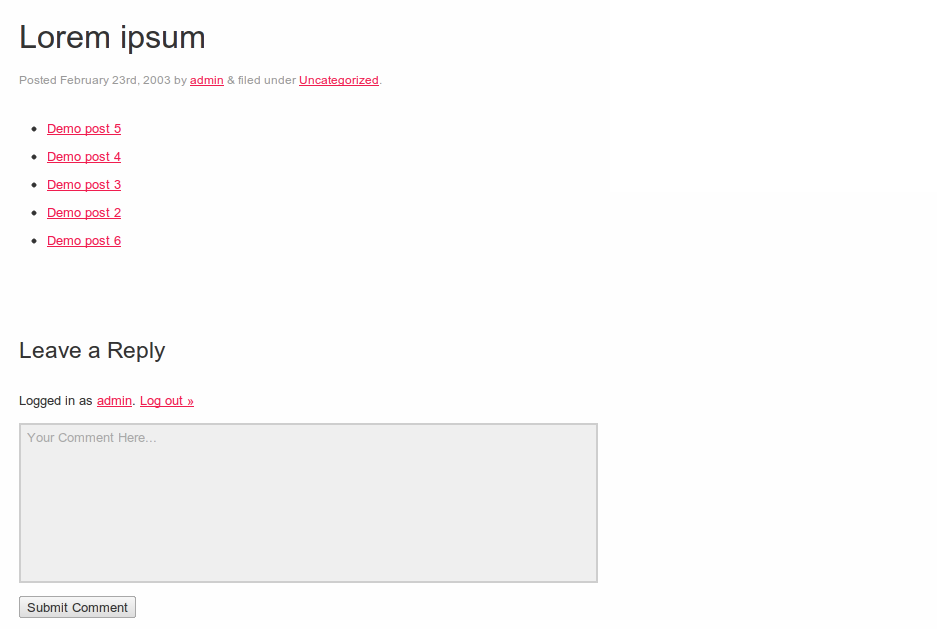
[recent-posts posts="5"]When viewing it in the browser, you should see links to the five most recent posts in the content:
Advanced shortcode
Content in Shortcode
We can take our shortcode one step further and add the ability to pass some content as an argument, which in this case will be a heading for the list of recent posts. To do this, we use a second parameter, $content, in the callback function and add it as an h3 heading before the list. The new function is as follows:
function recent_posts_function($atts, $content = null) {
   extract(shortcode_atts(array(
      'posts' => 1,
   ), $atts));

   $return_string = '<h3>'.$content.'</h3>';
   $return_string .= '<ul>';
   query_posts(array('orderby' => 'date', 'order' => 'DESC' , 'showposts' => $posts));
   if (have_posts()) :
      while (have_posts()) : the_post();
         $return_string .= '<li><a href="'.get_permalink().'">'.get_the_title().'</a></li>';
      endwhile;
   endif;
   $return_string .= '</ul>';

   wp_reset_query();
   return $return_string;
}
This kind of shortcode is similar to an HTML tag. We enclose the content in an opening and closing shortcode:
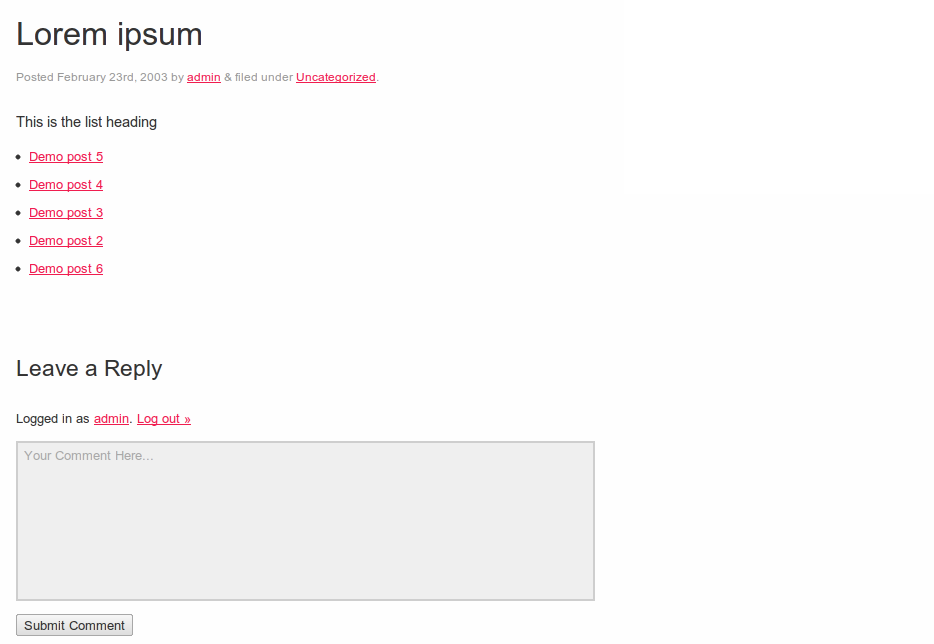
[recent-posts posts="5"]This is the list heading[/recent-posts]The result is the same as the previous example, except for the new heading for the list of posts:
Content in shortcode
Shortcodes Anywhere, Anytime!
Enabling Shortcodes in Widgets
By default, shortcodes are ignored in WordPress sidebar widgets. Take the following as an example:
[recent-posts posts="5"]If you type this shortcode into a widget, it would look something like this:
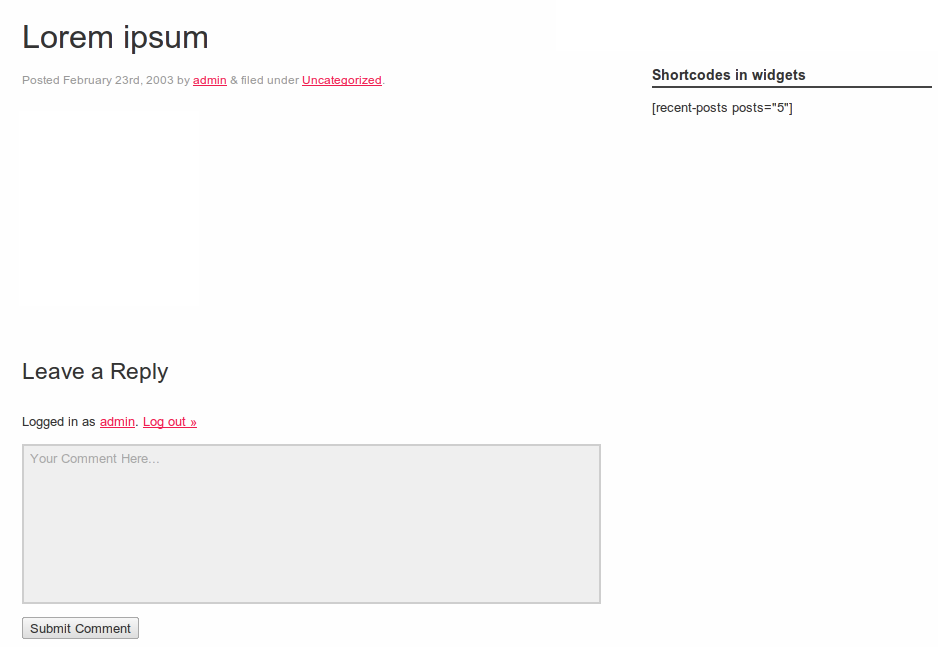
A shortcode in a widget before enabling the functionality
With WordPress, we can enable this functionality with a single line of code. To be able to add shortcodes in widgets, add the following:
add_filter('widget_text', 'do_shortcode');Now, without having to change anything else, the shortcode will display properly in widgets:
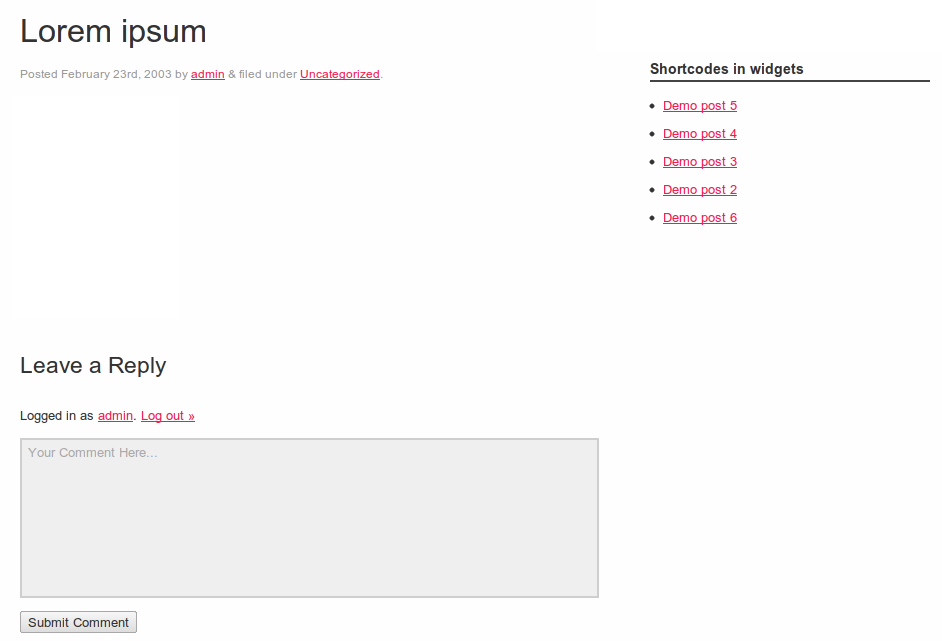
A shortcode in a widget after enabling the functionality
Similarly, we can enable shortcodes in comments:
add_filter( 'comment_text', 'do_shortcode' );And excerpts:
add_filter( 'the_excerpt', 'do_shortcode');Shortcode TinyMCE Editor Button
While shortcodes are a handy way to add dynamic content to posts, the might be a bit confusing for the average user, especially when they get complicated, with multiple parameteres. Most users are not familiar with HTML-like syntax; and yet they have to remember the exact syntax and all available attributes of shortcodes, because even a minor syntax error could cause an undesirable result.
To resovle this, we can add a button to the TinyMCE editor`s interface, enabling the user to create a shortcode with a simple click. There are two basic steps to creating this button:
- Create the JavaScript file for the button.
- Register the button and the JavaScript file.
JavaScript File for the Button
The JavaScript file is used to register the TinyMCE plugin through the TinyMCE API. We create a new file named recent-posts.js in the js directory of our theme, and then we type the following piece of code:
(function() {
   tinymce.create('tinymce.plugins.recentposts', {
      init : function(ed, url) {
         ed.addButton('recentposts', {
            title : 'Recent posts',
            image : url+'/recentpostsbutton.png',
            onclick : function() {
               var posts = prompt("Number of posts", "1");
               var text = prompt("List Heading", "This is the heading text");

               if (text != null && text != ''){
                  if (posts != null && posts != '')
                     ed.execCommand('mceInsertContent', false, '[recent-posts posts="'+posts+'"]'+text+'[/recent-posts]');
                  else
                     ed.execCommand('mceInsertContent', false, '[recent-posts]'+text+'[/recent-posts]');
               }
               else{
                  if (posts != null && posts != '')
                     ed.execCommand('mceInsertContent', false, '[recent-posts posts="'+posts+'"]');
                  else
                     ed.execCommand('mceInsertContent', false, '[recent-posts]');
               }
            }
         });
      },
      createControl : function(n, cm) {
         return null;
      },
      getInfo : function() {
         return {
            longname : "Recent Posts",
            author : 'Konstantinos Kouratoras',
            authorurl : 'http://www.kouratoras.gr',
            infourl : '',
            version : "1.0"
         };
      }
   });
   tinymce.PluginManager.add('recentposts', tinymce.plugins.recentposts);
})();
As shown below, we create a new plugin, calling the tinymce.create() method, passing in the plugin’s name and the attributes. The most important part of this code is the init() function, where we define a name, an icon file and an event handler for the button using the onclick()function.
In the first two lines of the onclick() function, the user is prompted to input the parameters for the number of posts and list heading of the shortcode. Then, depending on the values of these parameters, the appropriate shortcode form is inserted in the editor.
Finally, our TinyMCE plugin is added to the PluginManager using the add() function. Now we’ve successfully integrated the [recent-posts] shortcode into a WordPress theme.
Registering the Button and TinyMCE Plugin
After creating the JavaScript file, we need to register it and the shortcode button. So, we create two functions and tie them to the corresponding WordPress filters.
The first function is named register_button() and pushes the shortcode into the array of buttons, adding a divider between the new button and the existing ones:
function register_button( $buttons ) {
   array_push( $buttons, "|", "recentposts" );
   return $buttons;
}
The second function, add_plugin(), points to the path and name of the JavaScript file:
function add_plugin( $plugin_array ) {
   $plugin_array['recentposts'] = get_template_directory_uri() . '/js/recent-posts.js';
   return $plugin_array;
}
The next step is to add a filter with the previous functions. The register_button() function is tied to the mce_buttons filter, which is executed when the editor loads the plugins, and add_plugin() is tied to mce_external_plugins filter, which is executed when the buttons are about to be loaded:
function my_recent_posts_button() {

   if ( ! current_user_can('edit_posts') && ! current_user_can('edit_pages') ) {
      return;
   }

   if ( get_user_option('rich_editing') == 'true' ) {
      add_filter( 'mce_external_plugins', 'add_plugin' );
      add_filter( 'mce_buttons', 'register_button' );
   }

}
The previous function takes no action if the user does not have permission to edit posts or pages or if the user is not in visual editor mode.
Finally, we hook the function into WordPress’ initialization action to execute this when a page loads:
add_action('init', 'my_recent_posts_button');Button Usage
To check that the shortcode button functions properly, let’s create a new post or edit an existing one. A new button, with the icon that we set before, should have been added to the left of the first line of the TinyMCE buttons, as in this screenshot:
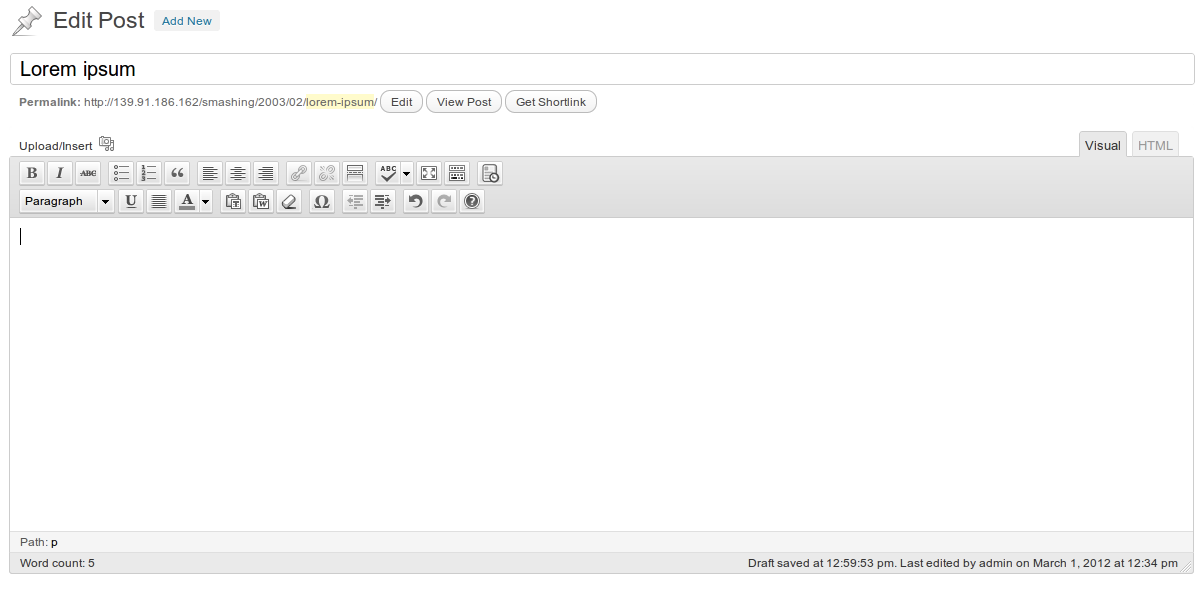
Shortcode TinyMCE editor button
When we press the shortcode button, a dialog appears that prompts us to type the shortcode parameter for the number of posts:
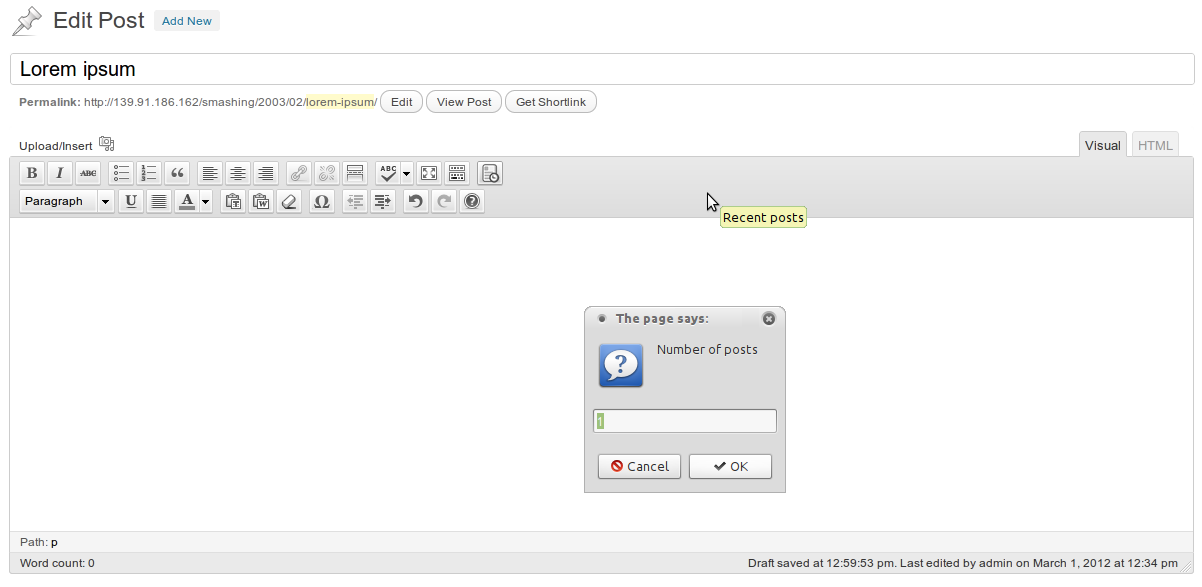
Shortcode TinyMCE editor button
After inserting the number of posts, a second dialog appears, prompting us to type in the heading of the list:
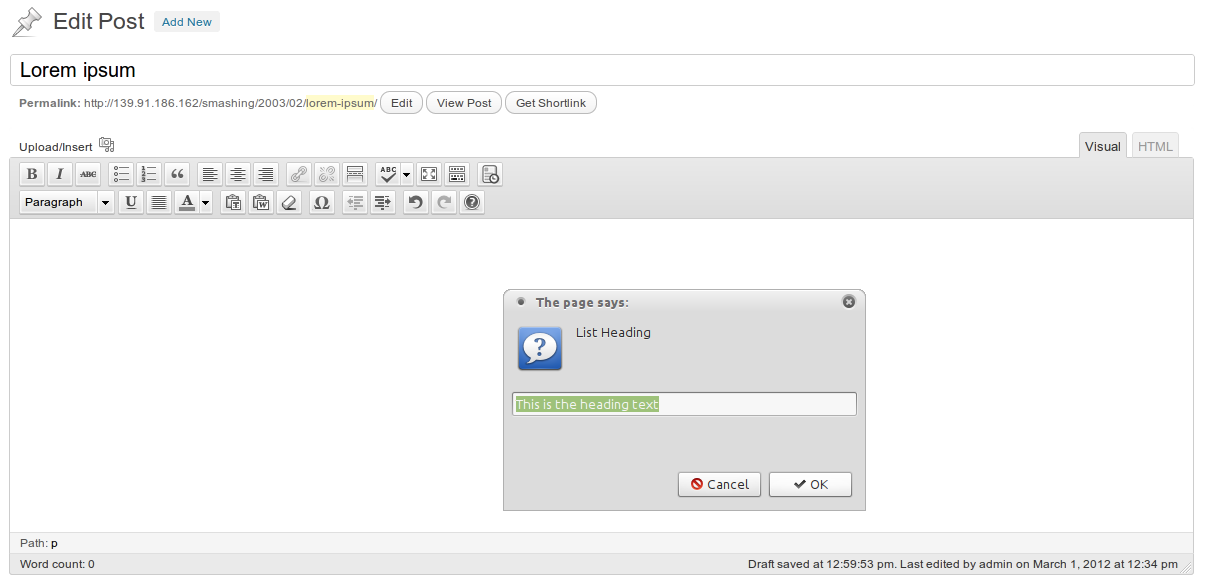
Shortcode TinyMCE editor button
If any parameter is left blank, it will not be included in the final shortcode.
Finally, the shortcode appears in the editor:
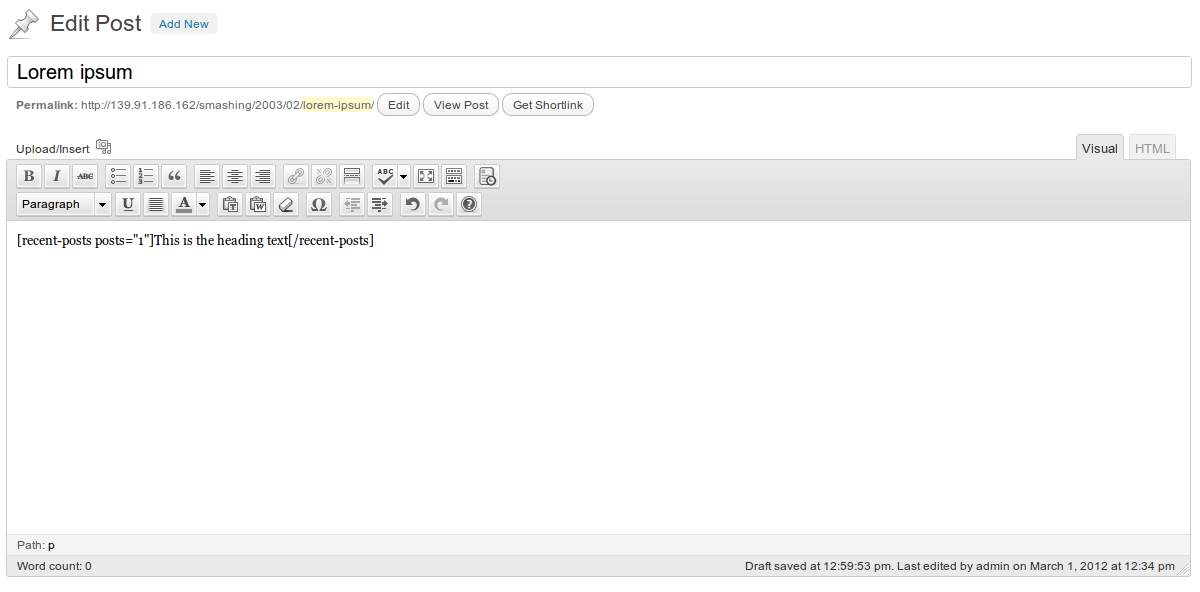
Shortcode TinyMCE editor button
Some Useful Shortcodes
This part of the tutorial provides the source code for some userful WordPress shortcodes that will take your blog one step up.
Link Button
One simple example is the link button shortcode:
function linkbutton_function( $atts, $content = null ) {
   return '<button type="button">'.do_shortcode($content).'</button>';
}
add_shortcode('linkbutton', 'linkbutton_function');
Use this shortcode as follows:
[linkbutton]Click Me![/linkbutton]Something like this should appear:

Link button shortcode
WordPress Menu
Let’s move on to a more complex shortcode, one that grabs a WordPress menu:
function menu_function($atts, $content = null) {
   extract(
      shortcode_atts(
         array( 'name' => null, ),
         $atts
      )
   );
   return wp_nav_menu(
      array(
          'menu' => $name,
          'echo' => false
          )
   );
}
add_shortcode('menu', 'menu_function');
When calling this shortcode, pass in the name of the menu you want to show:
[menu name="main-menu"]The menu will appear in your content:

Menu shortcode
Google Maps
A Google Maps shortcode is really useful, because we can insert a map into our content without needing to edit the source code.
function googlemap_function($atts, $content = null) {
   extract(shortcode_atts(array(
      "width" => '640',
      "height" => '480',
      "src" => ''
   ), $atts));
   return '<iframe width="'.$width.'" height="'.$height.'" src="'.$src.'&output=embed" ></iframe>';
}
add_shortcode("googlemap", "googlemap_function");
When typing the shortcode, pass in the width and height and the link from Google Maps as parameters:
[googlemap width="600" height="300" src="http://maps.google.com/maps?q=Heraklion,+Greece&hl=en&ll=35.327451,25.140495&spn=0.233326,0.445976& sll=37.0625,-95.677068&sspn=57.161276,114.169922& oq=Heraklion&hnear=Heraklion,+Greece&t=h&z=12"]The result is the following:
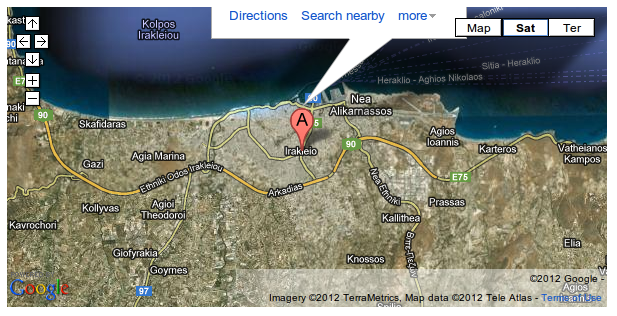
Google Maps shortcode
Google Charts
Another useful service is Google Charts, because it is very customizable. Here is a shortcode example with multiple attributes:
function chart_function( $atts ) {
   extract(shortcode_atts(array(
       'data' => '',
       'chart_type' => 'pie',
       'title' => 'Chart',
       'labels' => '',
       'size' => '640x480',
       'background_color' => 'FFFFFF',
       'colors' => '',
   ), $atts));

   switch ($chart_type) {
      case 'line' :
         $chart_type = 'lc';
         break;
      case 'pie' :
         $chart_type = 'p3';
         break;
      default :
         break;
   }

   $attributes = '';
   $attributes .= '&chd=t:'.$data.'';
   $attributes .= '&chtt='.$title.'';
   $attributes .= '&chl='.$labels.'';
   $attributes .= '&chs='.$size.'';
   $attributes .= '&chf='.$background_color.'';
   $attributes .= '&chco='.$colors.'';

   return '<img title="'.$title.'" src="http://chart.apis.google.com/chart?cht='.$chart_type.''.$attributes.'" alt="'.$title.'" />';
}
add_shortcode('chart', 'chart_function');
To create a pie chart with four types of data, we insert the following line:
[chart type="pie" title="Example Pie Chart" data="41.12,32.35,21.52,5.01" labels="First+Label|Second+Label|Third+Label|Fourth+Label" background_color="FFFFFF" colors="D73030,329E4A,415FB4,DFD32F" size="450x180"]The result is a pie like the following:
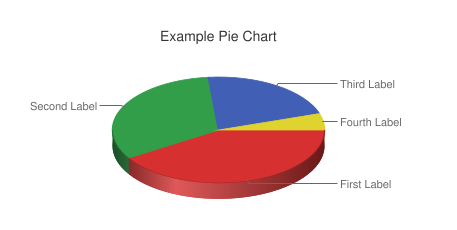
Google Charts shortcode
PDF embedding
We can use the Google Docs PDF viewer to embed a PDF on your website. Here is the shortcode to do this:
function pdf_function($attr, $url) {
   extract(shortcode_atts(array(
       'width' => '640',
       'height' => '480'
   ), $attr));
   return '<iframe src="http://docs.google.com/viewer?url=' . $url . '&embedded=true" style="width:' .$width. '; height:' .$height. ';">Your browser does not support iframes</iframe>';
}
add_shortcode('pdf', 'pdf_function');
To embed a PDF, type the shortcode [pdf], and pass in the URL as the content argument:
[pdf width="520px" height="700px"]http://static.fsf.org/common/what-is-fs-new.pdf[/pdf]When viewing the page, the visitor will see a viewer with the PDF:
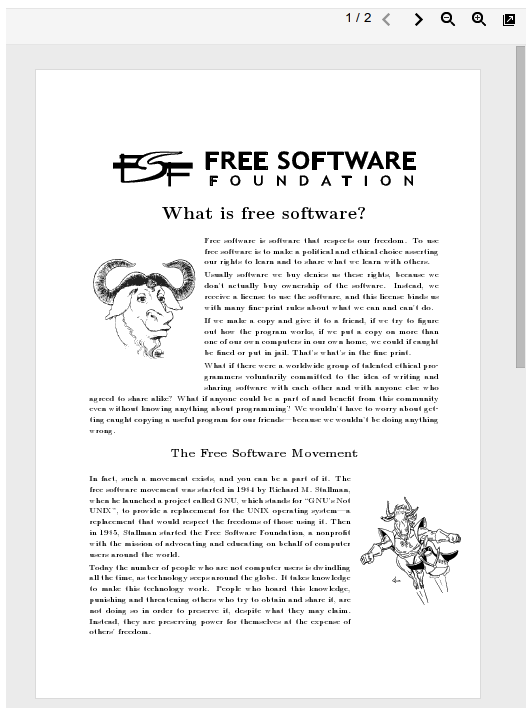
PDF embedding shortcode
Shortcodes WordPress Plugins
Thanks to WordPress plugins, adding shortcode functionality to a website requires no source-code editing at all. If you look at the WordPress plugins directory, you’ll see a large number of such plugins with which to style posts and pages. In this section, we’ll recommend some of the best shortcode plugins (favoring the free ones) to satisfy your every need.
Shortcodes Ultimate
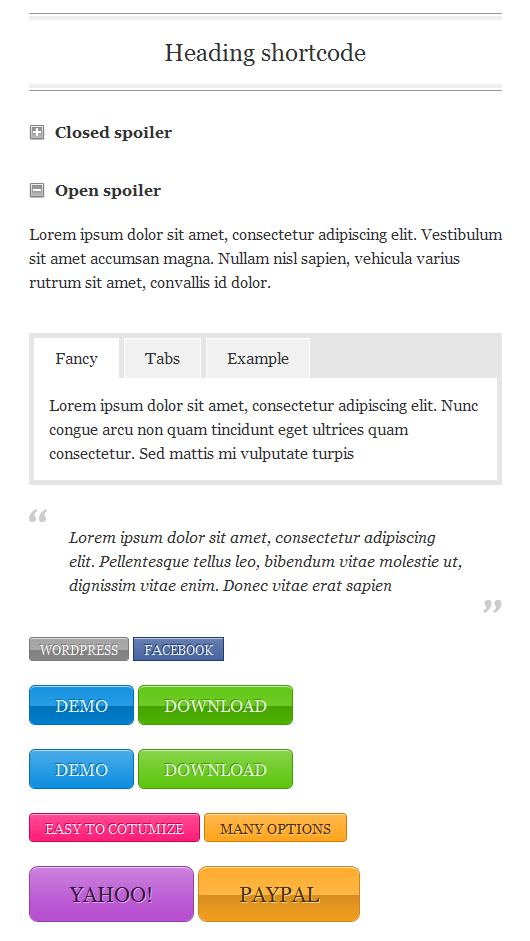
Without a doubt, this is the best shortcode plugin out there. It enables you to easily create buttons, tabs, boxes, sliders, tooltips and many more elements.
J Shortcodes
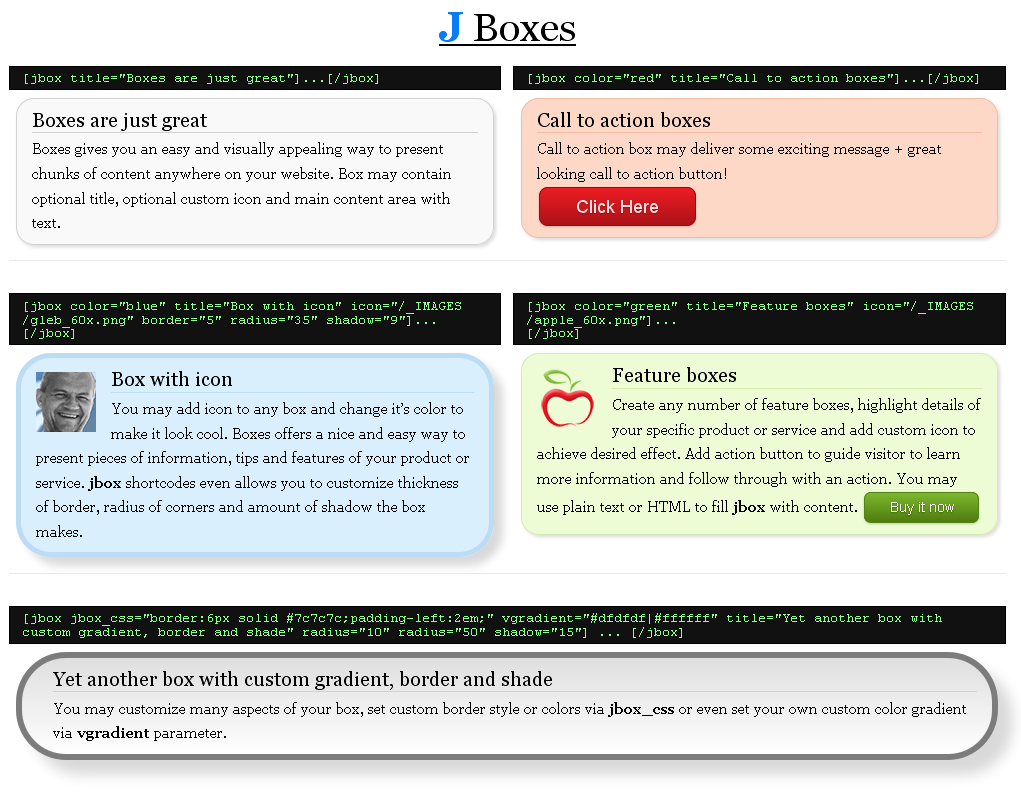
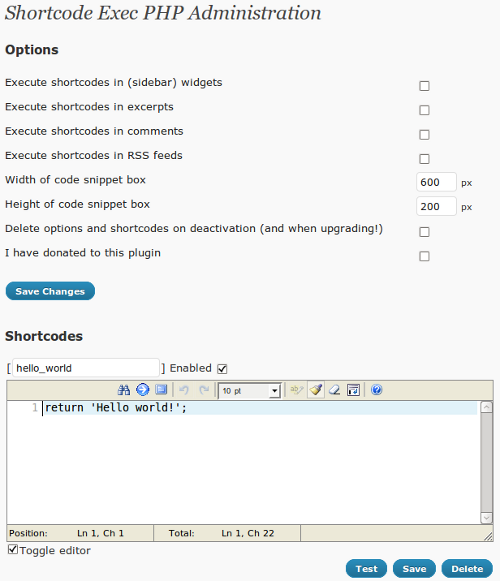
The J Shortcodes plugin is similar to Shortcodes Ultimate, offering a collection of useful elements to style a website, including buttons, boxes, tabs and accordions. J Shortcodes lets you set custom attributes on elements, such as color, size and shape, and define custom column layouts on any page or post.
Resources From Around the Web
function register_button( $buttons ) {
   array_push( $buttons, "|", "recentposts" );
   return $buttons;
}
The second function, add_plugin(), points to the path and name of the JavaScript file:
function add_plugin( $plugin_array ) {
   $plugin_array['recentposts'] = get_template_directory_uri() . '/js/recent-posts.js';
   return $plugin_array;
}
The next step is to add a filter with the previous functions. The register_button() function is tied to the mce_buttons filter, which is executed when the editor loads the plugins, and add_plugin() is tied to mce_external_plugins filter, which is executed when the buttons are about to be loaded:
function my_recent_posts_button() {

   if ( ! current_user_can('edit_posts') && ! current_user_can('edit_pages') ) {
      return;
   }

   if ( get_user_option('rich_editing') == 'true' ) {
      add_filter( 'mce_external_plugins', 'add_plugin' );
      add_filter( 'mce_buttons', 'register_button' );
   }

}
The previous function takes no action if the user does not have permission to edit posts or pages or if the user is not in visual editor mode.
Finally, we hook the function into WordPress’ initialization action to execute this when a page loads:
add_action('init', 'my_recent_posts_button');Button Usage
To check that the shortcode button functions properly, let’s create a new post or edit an existing one. A new button, with the icon that we set before, should have been added to the left of the first line of the TinyMCE buttons, as in this screenshot:

Shortcode TinyMCE editor button
When we press the shortcode button, a dialog appears that prompts us to type the shortcode parameter for the number of posts:

Shortcode TinyMCE editor button
After inserting the number of posts, a second dialog appears, prompting us to type in the heading of the list:

Shortcode TinyMCE editor button
If any parameter is left blank, it will not be included in the final shortcode.
Finally, the shortcode appears in the editor:

Shortcode TinyMCE editor button
Some Useful Shortcodes
This part of the tutorial provides the source code for some userful WordPress shortcodes that will take your blog one step up.
Link Button
One simple example is the link button shortcode:
function linkbutton_function( $atts, $content = null ) {
   return '<button type="button">'.do_shortcode($content).'</button>';
}
add_shortcode('linkbutton', 'linkbutton_function');
Use this shortcode as follows:
[linkbutton]Click Me![/linkbutton]Something like this should appear:

Link button shortcode
WordPress Menu
Let’s move on to a more complex shortcode, one that grabs a WordPress menu:
function menu_function($atts, $content = null) {
   extract(
      shortcode_atts(
         array( 'name' => null, ),
         $atts
      )
   );
   return wp_nav_menu(
      array(
          'menu' => $name,
          'echo' => false
          )
   );
}
add_shortcode('menu', 'menu_function');
When calling this shortcode, pass in the name of the menu you want to show:
[menu name="main-menu"]The menu will appear in your content:

Menu shortcode
Google Maps
A Google Maps shortcode is really useful, because we can insert a map into our content without needing to edit the source code.
function googlemap_function($atts, $content = null) {
   extract(shortcode_atts(array(
      "width" => '640',
      "height" => '480',
      "src" => ''
   ), $atts));
   return '<iframe width="'.$width.'" height="'.$height.'" src="'.$src.'&output=embed" ></iframe>';
}
add_shortcode("googlemap", "googlemap_function");
When typing the shortcode, pass in the width and height and the link from Google Maps as parameters:
[googlemap width="600" height="300" src="http://maps.google.com/maps?q=Heraklion,+Greece&hl=en&ll=35.327451,25.140495&spn=0.233326,0.445976& sll=37.0625,-95.677068&sspn=57.161276,114.169922& oq=Heraklion&hnear=Heraklion,+Greece&t=h&z=12"]The result is the following:

Google Maps shortcode
Google Charts
Another useful service is Google Charts, because it is very customizable. Here is a shortcode example with multiple attributes:
function chart_function( $atts ) {
   extract(shortcode_atts(array(
       'data' => '',
       'chart_type' => 'pie',
       'title' => 'Chart',
       'labels' => '',
       'size' => '640x480',
       'background_color' => 'FFFFFF',
       'colors' => '',
   ), $atts));

   switch ($chart_type) {
      case 'line' :
         $chart_type = 'lc';
         break;
      case 'pie' :
         $chart_type = 'p3';
         break;
      default :
         break;
   }

   $attributes = '';
   $attributes .= '&chd=t:'.$data.'';
   $attributes .= '&chtt='.$title.'';
   $attributes .= '&chl='.$labels.'';
   $attributes .= '&chs='.$size.'';
   $attributes .= '&chf='.$background_color.'';
   $attributes .= '&chco='.$colors.'';

   return '<img title="'.$title.'" src="http://chart.apis.google.com/chart?cht='.$chart_type.''.$attributes.'" alt="'.$title.'" />';
}
add_shortcode('chart', 'chart_function');
To create a pie chart with four types of data, we insert the following line:
[chart type="pie" title="Example Pie Chart" data="41.12,32.35,21.52,5.01" labels="First+Label|Second+Label|Third+Label|Fourth+Label" background_color="FFFFFF" colors="D73030,329E4A,415FB4,DFD32F" size="450x180"]The result is a pie like the following:

Google Charts shortcode
PDF embedding
We can use the Google Docs PDF viewer to embed a PDF on your website. Here is the shortcode to do this:
function pdf_function($attr, $url) {
   extract(shortcode_atts(array(
       'width' => '640',
       'height' => '480'
   ), $attr));
   return '<iframe src="http://docs.google.com/viewer?url=' . $url . '&embedded=true" style="width:' .$width. '; height:' .$height. ';">Your browser does not support iframes</iframe>';
}
add_shortcode('pdf', 'pdf_function');
To embed a PDF, type the shortcode [pdf], and pass in the URL as the content argument:
[pdf width="520px" height="700px"]http://static.fsf.org/common/what-is-fs-new.pdf[/pdf]When viewing the page, the visitor will see a viewer with the PDF:

PDF embedding shortcode
Shortcodes WordPress Plugins
Thanks to WordPress plugins, adding shortcode functionality to a website requires no source-code editing at all. If you look at the WordPress plugins directory, you’ll see a large number of such plugins with which to style posts and pages. In this section, we’ll recommend some of the best shortcode plugins (favoring the free ones) to satisfy your every need.
Shortcodes Ultimate
Without a doubt, this is the best shortcode plugin out there. It enables you to easily create buttons, tabs, boxes, sliders, tooltips and many more elements.

J Shortcodes
The J Shortcodes plugin is similar to Shortcodes Ultimate, offering a collection of useful elements to style a website, including buttons, boxes, tabs and accordions. J Shortcodes lets you set custom attributes on elements, such as color, size and shape, and define custom column layouts on any page or post.


Resources From Around the Web
Last but not least, here are some articles you might find useful.
- “Mastering WordPress Shortcodes,” Smashing Magazine A great article that shows how to create and use shortcodes, providing some ready-to-use WordPress shortcodes.
- “Getting Started with WordPress Shortcodes (+Examples)”),” SpeckyBoy This tutorial is a good place to start messing with shortcodes.
- “Getting Started With WordPress Shortcodes,” Tuts+ This gives a detailed explanation of the WordPress shortcode API, showing some useful examples of more advanced shortcodes.
- “Shortcode API,” WordPress Codex The official page of the API in the WordPress Codex.
- “Shortcodes,” WordPress Support Lists some useful built-in shorcodes.
 (al)
(al)


