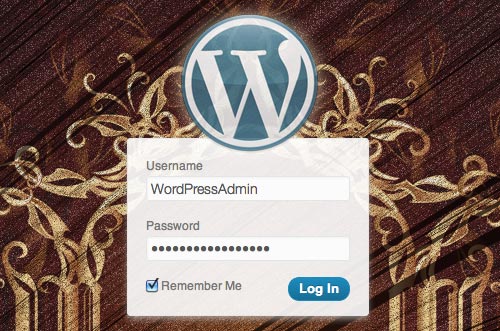
In this article, we take a break from some of the more advanced ways to customize WordPress, and share some super-easy customization techniques for the WordPress Admin area.
If you’re just getting started with WordPress, or have been running with default functionality for a while and now want to dig in with some useful and easy ways to customize your WordPress site, a great place to start is the WordPress Admin area, or backend. One of the great things about WordPress is that each part of the backend is easily customized using simple PHP functions.

In this article, you’ll learn how to customize the login page with your own logo, add new widgets to the dashboard, add custom content to the admin footer, make it easier to get in and out of the Admin area, and more. When combined, these techniques can improve branding, accessibility, and usability of your WordPress-powered site.
Further Reading on SmashingMag:
- Modifying Admin Post Lists In WordPress
- Useful Free Admin Plugins For WordPress
- Ten Things Every WordPress Plugin Developer Should Know
- Inside The WordPress Toolbar
Changing the Default WordPress Login URL
By default, logging in to the WordPress Admin area requires either /wp-admin or /wp-login.php in the URL, which isn’t a lot to type. You can, however, make it even easier by changing the login URL to something more memorable and better branded.
This technique requires .htaccess file manipulation. Usually, this is a file hidden in the root of your WordPress installation. It’s automatically created by WordPress after setting custom permalinks using URL rewriting.
First, check your SFTP/FTP client preferences to show hidden files—most FTP clients manage that. Then, check that the file .htaccess exists. If that is not the case, create it by using your favorite notepad. On Windows, use the Notepad++ software to create it. Open it and add this line on top:
RewriteRule ^login$ http://YOUR_SITE.com/wp-login.php [NC,L]Just replace the login keyword with one of your choice and your website’s URL.
Now, open your favorite browser and go to http://yoursite.com/login. You’ll be redirected to the WordPress login page. Remember that your clients are not supposed to know everything about WordPress usages—a user-friendly URL is far better to remember than /wp-login.php.
Easy to remember, easy to teach, easy to learn!
Changing the Default External Link of the WordPress Login Page
When you log into WordPress, the default logo links to WordPress.org. Let me show you a quick tip for using your own link. Open the functions.php file. Then, add the following lines of code. And be sure to remember the PHP tag enclosure.
// Use your own external URL logo link
function wpc_url_login(){
    return "http://wpchannel.com/"; // your URL here
}
add_filter('login_headerurl', 'wpc_url_login');
Don’t forget to save the file. Log out to view the result. Better, no?
Customizing the Login logo Without a Plugin
Reinforce your brand by changing the default WordPress login logo. The logo is one of the most important elements of your brand! People will memorize it to find you quickly. Showcase it!
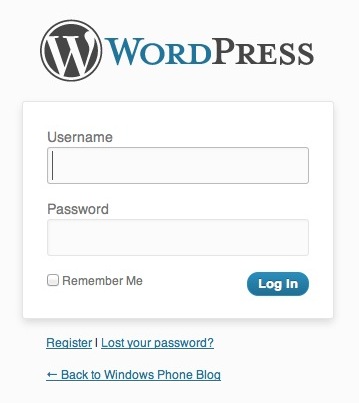
This is the default WordPress login screen:
To enhance it, add these lines of code in your functions.php:
// Custom WordPress Login Logo
function login_css() {
    wp_enqueue_style( 'login_css', get_template_directory_uri() . '/css/login.css' );
}
add_action('login_head', 'login_css');
The third line points towards a separate stylesheet. Even though it’s possible to use that of your default CSS theme, I advise you to use Firebug—a useful Firefox add-on—or any other Web development tool that allows you to edit your website in real-time. As you can see, just one line of code is needed to change the default logo.
#login h1 a {
    background-image: url("http://YOUR-WEBSITE.com/wp-content/themes/YOUR_THEME/images/custom_logo.png") !important;
    }
Feel free to change the logo URL if it’s not located in your theme folder. Now have a look at your login page: your custom logo appears!
If that is not the case, make sure that no white lines are present at the end of your functions.php file.
Changing the Footer of Your WordPress Administration
The default WordPress administration footer thanks you for using their content management system and links to WordPress.org. For professional use and website branding, you’ll want to customize this area.
Open the Appearance menu and click on Editor. Click on functions.php on the right side of your screen. You can also access the footer by using an FTP client to locate /wp-content/themes/NAME_OF_YOUR_THEME/functions.php.
Now, add the following lines of code, taking care to place them between PHP tags:
// Custom WordPress Footer
function remove_footer_admin () {
    echo '© 2012 - WordPress Channel, Aurélien Denis';
}
add_filter('admin_footer_text', 'remove_footer_admin');
To customize the content, just change the second line inside the echo, between the quotes.
Finally, refresh your browser to see the result.
Adding Custom Widgets to Your Dashboard
It can be useful to add your own widget to provide general or commercial information. Adding a widget to the WordPress dashboard can be done very quickly. Again, open the functions.php file, then, add the following lines of code:
// Add a widget in WordPress Dashboard
function wpc_dashboard_widget_function() {
    // Entering the text between the quotes
    echo "<ul>
    <li>Release Date: March 2012</li>
    <li>Author: Aurelien Denis.</li>
    <li>Hosting provider: my own server</li>
    </ul>";
}
function wpc_add_dashboard_widgets() {
    wp_add_dashboard_widget('wp_dashboard_widget', 'Technical information', 'wpc_dashboard_widget_function');
}
add_action('wp_dashboard_setup', 'wpc_add_dashboard_widgets' );
In this example, add the desired text between the echo tag, after the quotes. You could also insert HTML; an unordered list for example. Name your widget—this will be the widget title—by replacing “Technical informations” with your title of choice. This is what it will look like.
If you do not see your custom widget, click on the Options menu screen located in the top right of the window to display it.
Hiding Unwanted WordPress Dashboard Widgets
The WordPress dashboard displays multiple widgets that you can easily move by dragging and dropping. To mask them definitively, just add the following lines in the functions.php file:
add_action('wp_dashboard_setup', 'wpc_dashboard_widgets');
function wpc_dashboard_widgets() {
    global $wp_meta_boxes;
    // Today widget
    unset($wp_meta_boxes['dashboard']['normal']['core']['dashboard_right_now']);
    // Last comments
    unset($wp_meta_boxes['dashboard']['normal']['core']['dashboard_recent_comments']);
    // Incoming links
    unset($wp_meta_boxes['dashboard']['normal']['core']['dashboard_incoming_links']);
    // Plugins
    unset($wp_meta_boxes['dashboard']['normal']['core']['dashboard_plugins']);
}
You can choose what widgets you’d like to hide. In this case, “Right Now”, “Recent comments”, “Incoming links” and “Plugins” have been removed from your WordPress dashboard. To learn more about this feature, have a look at the codex.
Creating Your Own Custom Admin Color Scheme
If you’re not totally satisfied with the WordPress admin color scheme, this is how you can customize it. All you need to do is create a new CSS stylesheet. In this example, we’ll call it admin.css and place it in a folder entitled/css. Once again, edit the functions.php file and add this snippet:
// Custom WordPress Admin Color Scheme
function admin_css() {
    wp_enqueue_style( 'admin_css', get_template_directory_uri() . '/css/admin.css' );
}
add_action('admin_print_styles', 'admin_css' );
Your admin.css file must contain styles that are compatible with WordPress. Again, I recommend you use Firebug or Web Inspector to identify the right ones.
Conclusion
That’s all folks! I hope you have learned a few good tips to make WordPress act more like a white label CMS. Remember that customization is not just a branding technique, but also a way to boosting your productivity, by increasing user-friendliness.
If you’re not comfortable with PHP, you can make most of these changes with the White Label CMS WordPress plugin. Do you know any other great tips? Share them with us!
 (jc)
(jc)


