


WordPress is amazing. With its growing popularity and continual development, it is becoming the tool of choice for many designers and developers. WordPress projects, though, are pushing well beyond the confines of mere “posts” and “pages”. How do you go about adding and organizing media and all its complexities? With the introduction of WordPress 3.1, several new features were added that make using WordPress to manage media even more practical and in this tutorial, we’re going to dive in and show you how.
In part one, we’re going to setup custom post types and custom taxonomies, without plugins. After that, we’ll build a template to check for and display media attached to custom posts. Then, in part two, we’ll use custom taxonomy templates to organize and relate media (and other types of content).
Further Reading on SmashingMag:
- Creating Mobile-Optimized Websites Using WordPress
- A Beginner’s Guide To Creating A WordPress Website
- How To Make Your Websites Faster On Mobile Devices
- My (Simple) Workflow To Design And Develop A Portfolio Website
- A Comprehensive Checklist To Creating The Perfect WP Website
As we focus on building a media centric site, I also want you to see that the principles taught in this series offer you a set of tools and experience to build interfaces for and organize many different types of content. Examples include:
- A “Media” center, of any type, added to an existing WordPress site
- A repository of videos, third party hosted (e.g. Vimeo, YouTube, etc), organized by topics and presenters
- A music site, with streaming and song downloads, organized by bands and associated by albums
- An author-driven Q&A site, with user submitted questions organized by topics and geographical location
- A recipe site with videos and visitor ratings, organized by category and shared ingredients
In a future tutorial, we will focus on customizing the WordPress backend (with clients especially in mind) to manage a media site and in another tutorial we will use the foundation laid to build a dynamic filtering interface that allows visitors to quickly sort their way through hundreds or even thousands of custom posts.
Requirements
- WordPress 3.1 - With the release of 3.1, several new features related to the use of custom post types and taxonomies were introduced that are essential to the techniques taught in this series.
- Basic Familiarity with PHP (or “No Fear”) - To move beyond copying and pasting the examples I’ve given will require a basic familiarity with PHP or, at least, a willingness to experiment. If the code samples below are intimidating to you and you have the desire to learn, then I encourage you to tackle it and give it your best. If you have questions, ask in the comments.
Working Example
In April, 2011 we (Sabramedia, of which I am a co-founder) worked with an organization in Southern California to develop a resource center on WordPress to showcase their paid and free media products. On the front-end, we built a jQuery powered filtering interface to allow visitors to filter through media on-page. We’ll cover the ins and outs of building a similar interface in part three.

The “Resource Center” on ARISE, with a custom taxonomy filter (“David Asscherick”) pre-selected.
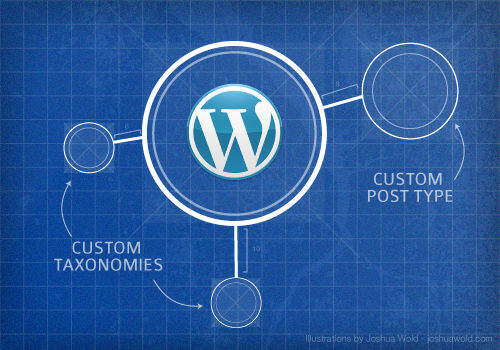
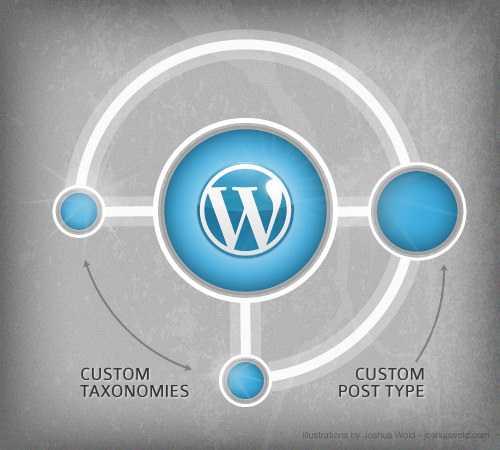
Working With Custom Post Types
By default, WordPress offers two different types of posts for content. First, you have the traditional “post”, used most often for what WordPress is known best for - blogging. Second, you have “pages”. Each of these, as far as WordPress is concerned, is a type of “post”. A custom post type is a type of post that you define.
Note: You can learn more about post types on the WordPress Codex.
In this series, we are going to use custom post types to build a media based resource center. I will be defining and customizing a post type of “resource”.
Setting Up Your Custom Post Type
You can setup your custom post types by code or by plugin. In these examples, I will be setting up the post type by code, storing and applying the code directly in the functions file on the default WordPress theme, Twenty Ten. You can follow along by using a plugin to setup the post types for you or by copying the code samples into the bottom of your theme’s custom functions file (functions.php).
Note: As a best practice, unless you use an existing plugin to create the post types, you may want to consider creating your own WordPress plugin. Setting up custom post types and taxonomies separate from your theme becomes important if and when you want to make major changes to your theme or try a new theme out. Want to save some typing? Use the custom post code generator.
Alright, let’s setup our custom post type. Paste the following code into your theme’s functions.php:
add_action('init', 'register_rc', 1); // Set priority to avoid plugin conflicts

function register_rc() { // A unique name for our function
  $labels = array( // Used in the WordPress admin
    'name' => _x('Resources', 'post type general name'),
    'singular_name' => _x('Resource', 'post type singular name'),
    'add_new' => _x('Add New', 'Resource'),
    'add_new_item' => __('Add New Resource'),
    'edit_item' => __('Edit Resource'),
    'new_item' => __('New Resource'),
    'view_item' => __('View Resource '),
    'search_items' => __('Search Resources'),
    'not_found' =>  __('Nothing found'),
    'not_found_in_trash' => __('Nothing found in Trash')
  );
  $args = array(
    'labels' => $labels, // Set above
    'public' => true, // Make it publicly accessible
    'hierarchical' => false, // No parents and children here
    'menu_position' => 5, // Appear right below "Posts"
    'has_archive' => 'resources', // Activate the archive
    'supports' => array('title','editor','comments','thumbnail','custom-fields'),
  );
  register_post_type( 'resource', $args ); // Create the post type, use options above
}
The code above tells WordPress to “register” a post type called “resource”. Then, we pass in our options, letting WordPress know that we want to use our own labels, that we want our post type to be publicly accessible, non-hierarchal, and that we want it to show up right below “posts” in our admin menu. Then, we activate the “archive” feature, new in WordPress 3.1. Finally, we add in “supports”: the default title field, the WordPress editor, comments, featured thumbnail, and custom fields (I’ll explain that later).
Note: For more information on setting up the post type and for details on all the options you have (there are quite a few available), refer to the register_post_type function reference on the WordPress Codex.
If the code above was successful, you will see a new custom post type, appearing below “Posts” in the WordPress admin menu. It will look something like this:

A view of the WordPress Admin, after adding a custom post type
We’re in good shape! Next, let’s setup our custom taxonomies.
Working With Custom Taxonomies
A “taxonomy” is a way of organizing and relating information. WordPress offers two default taxonomies, categories and tags. Categories are hierarchal (they can have sub-categories) and are often used to organize content on a more broad basis. Tags, are non-hierarchal (no sub-tags) and are often used to organize content across categories.
A “term” is an entry within a taxonomy. For a custom taxonomy of “Presenters”, “John Smith” would be a term within that taxonomy.
In this series, we will be creating two different custom taxonomies to organize the content within our resource center.
- Presenters - Each media item in our resource center will have one or more presenters. For each presenter, we want to know their name and we want to include a short description. Presenters will be non-hierarchal.
- Topics - Our resource center will offer media organized by topics. Topics will be hierarchal, allowing for multiple sub-topics and even sub-sub-topics.
Note: Interested in working with more than the title and short description? Take a look at How To Add Custom Fields To Custom Taxonomies on the Sabramedia blog.
Setting Up Presenters
Our goal with presenters is to create a presenter profile, referenced on the respective media pages, that will give more information about the presenter and cross-reference other resources that they are associated with.
Add the following code to your theme’s functions.php file:
$labels_presenter = array(
  'name' => _x( 'Presenters', 'taxonomy general name' ),
  'singular_name' => _x( 'Presenter', 'taxonomy singular name' ),
  'search_items' =>  __( 'Search Presenters' ),
  'popular_items' => __( 'Popular Presenters' ),
  'all_items' => __( 'All Presenters' ),
  'edit_item' => __( 'Edit Presenter' ),
  'update_item' => __( 'Update Presenter' ),
  'add_new_item' => __( 'Add New Presenter' ),
  'new_item_name' => __( 'New Presenter Name' ),
  'separate_items_with_commas' => __( 'Separate presenters with commas' ),
  'add_or_remove_items' => __( 'Add or remove presenters' ),
  'choose_from_most_used' => __( 'Choose from the most used presenters' )
);

register_taxonomy(
  'presenters', // The name of the custom taxonomy
  array( 'resource' ), // Associate it with our custom post type
  array(
    'rewrite' => array( // Use "presenter" instead of "presenters" in the permalink
      'slug' => 'presenter'
      ),
    'labels' => $labels_presenter
    )
  );
Let’s break that down. First, we setup the labels to be used when we “register” our taxonomy. Then, we give it a name, in this case “presenters”, and assign it to the post type of “resource”. If you had multiple post types, you would add them in with a comma, like this:
array( ‘resource’, ‘other-type’ ), // Associate it with our custom post types
After that, we change the URL (or “permalink”) to satisfy our desire for grammatical excellence. Rather than being “/presenters/presenter-name” we update the “slug” (what is a slug?) to remove the “s” so that the permalink will read “/presenter/presenter-name”.
In our example, you should now notice a new menu option labeled “Presenters” under “Resources” in the admin sidebar. When you go to create a new resource you should also notice a meta box on the right side that looks like this:

My custom taxonomy of “Presenters” now shows up between the “Publish” box and “Featured Image”.
Note: To learn more about setting up custom taxonomies and the options available, take a look at the register_taxonomy function reference on the WordPress Codex.
Setting Up Topics
Our goal with topics is to allow for a hierarchal set of topics and sub-topics, each with their own page, showing the resources that are associated with each respective topic.
Add the following code to your theme’s functions.php file:
$labels_topics = array(
  'name' => _x( 'Topics', 'taxonomy general name' ),
  'singular_name' => _x( 'Topic', 'taxonomy singular name' ),
  'search_items' =>  __( 'Search Topics' ),
  'all_items' => __( 'All Topics' ),
  'parent_item' => __( 'Parent Topic' ),
  'parent_item_colon' => __( 'Parent Topic:' ),
  'edit_item' => __( 'Edit Topic' ),
  'update_item' => __( 'Update Topic' ),
  'add_new_item' => __( 'Add New Topic' ),
  'new_item_name' => __( 'New Topic Name' ),
);

register_taxonomy(
  'topics', // The name of the custom taxonomy
  array( 'resource' ), // Associate it with our custom post type
  array(
    'hierarchical' => true,
    'rewrite' => array(
      'slug' => 'topic', // Use "topic" instead of "topics" in permalinks
      'hierarchical' => true // Allows sub-topics to appear in permalinks
      ),
    'labels' => $labels_topics
    )
  );
That was easy enough! The code above is similar to setting up presenters, except this time we are using a few different labels, specific to hierarchal taxonomies. We set hierarchal to true (it’s set to “false” by default), we update the slug to be singular instead of plural, then, just before referencing our labels, we set the rewriting to be hierarchal. A hierarchal rewrite allows permalinks that look like this: /topic/topic-name/sub-topic-name.
With the above code implemented, you should notice another option below “Resources” in the WordPress admin and a new meta box that looks like this:

My custom taxonomy of “Topics” now shows up, albeit a bit empty looking, below “Presenters”.
Adding Custom Fields To Custom Post Types
In many cases, the “title” and “editor” (the default content editor in WordPress) aren’t going to be enough. What if you want to store extra information about a particular custom post? Examples might include:
- Duration of a media file - HH:MM:SS format, useful to pre-populate your media player with the duration on page load.
- Original recording date - Stored as a specific date with day, month, and year.
We call this “meta” information and it is a set of details that are specific to the individual item and usually make the most sense to store as meta data, as opposed to terms within a custom taxonomy. While you could put all these details in the “editor” field, it gives you very little flexibility with how this is displayed within your template.
So, let’s setup some custom fields. Use the custom fields interface at the bottom of an individual custom post to add some extra details about your custom post.
For our example, we’re going to add two fields. For each field, I will list the name, then an example value:
- recording_length - Example: 00:02:34
- recording_date - Example: March 16, 2011
Here’s how that looks after adding two custom fields:

An example of the custom fields interface after adding two “keys” and their respective “values”
Note: The default custom fields interface can be a bit limiting. If you’d like to make use of a plugin, try More Fields. The functionality is the same (just be mindful of what you name your custom fields) - a plugin typically offers you a better interface. If you want to build your own interface, take a look at WP Alchemy. To learn more about using custom fields, take a look at using custom fields on the WordPress Codex.
Custom Taxonomies vs. Custom Fields
At this point, you may run into a situation where you’re uncertain whether a particular piece of information should be stored as a custom taxonomy or as a custom field. Let’s use the recording date as an example. If we were to log the complete date, then it would probably make the most sense to store it within a custom field on the individual item. If we were to just use the year, though, we could store it as a term within a custom taxonomy (we’d probably call it “year”) and use it to show other resources recorded that same year.
The question is whether or not you want to relate content (in our case, “resources”) by the information you’re considering. If you don’t see any need to relate content (and don’t have plans to) then a custom field is the way to go. If you have a need to relate content or see a potential need down the road, then a custom taxonomy is the way to go.
Media Storage - WordPress vs. Third Party
Now that we have our custom post type and custom taxonomies in place, it’s time to upload some media. Our goal is to make this as simple a process for the end-user as possible. There are two ways that we can manage the media, either directly within WordPress or via third party.
- WordPress Managed - WordPress has a media management system built-in. You can upload media directly from your post type interface or from the “media” section in the WordPress admin. If storage or bandwidth becomes an issue, you can use a plugin (such as WP Super Cache) to offload the storage of the media to a third party content delivery network (CDN) to optimize delivery speed and save on bandwidth.
- Third Party - Going this route, you can use a media hosting service like YouTube, Vimeo, Scribd (PDFs), Issuu (ebooks), or any media hosting service that offers you an embed option.
Going the internal route, the media is stored inside of WordPress and associated with the individual custom post. We then access it as an attachment within the template. Going the third party route, we get the embed code (or the media ID) and store it inside of WordPress within a custom field. We’ll look at examples of both options further on.
Note: Working with images? Take a look at a recent Smashing article that covers better image management with WordPress.
Preparing The Stage - Adding New Media
We’re about to start working with the templates. Before we do that, though, we need to have some media to work with within our new custom post type. Before proceeding, make sure you’ve done the following:
- Create a new “resource” post (or whatever your post type may be) and give it a title and a description in the main content editor.
- Associate your resource with a non-hierarchical custom taxonomy you’ve created (e.g. A presenter named “Jonathan Wold”).
- Associate your resource with a hierarchical custom taxonomy you’ve created (e.g. A topic of “Family” and a sub-topic of “Children”)
- Add one or more custom fields with a unique “key” and “value” (e.g. a key of “recording_duration” and a value of “00:02:34”).
- Upload a video file to your custom post using the WordPress media manager (click the “video” icon just below the title field and right above the editor).
Note: If you're hosting your videos via third party, create a custom field to hold either the entire embed code or the ID of the video. I'll give you an example using Vimeo a bit later that will use the video ID.
Note #2: Depending on your hosting provider, you may run into trouble with a default upload limit, often 2MB or 8MB. Check out how to increase the WordPress upload limit.
After you’ve created a new post, previewing it should show you a screen, depending on your theme, will look something like this:

A preview of my custom post, displaying title and description, on the Twenty Ten theme.
Note: If you preview your post and get a “404” error, you may need to update your Permalinks. From the WordPress Admin, Go to “Settings”, then “Permalinks”, and click “Save Changes”. Refresh and you should be good to go.
Displaying Our Media - Working With Custom Post Templates
If you previewed your custom post, you probably saw something similar to what I showed in my example - not much. Where are the custom taxonomy terms, custom fields, and videos? Missing - but not for long! In the following steps, we’re going to create a custom template that tells WordPress what data to display and how to display it.
Creating A Custom Post Type Template
The WordPress template engine has a hierarchy that it follows when deciding what theme template it uses to display data associated with a post. In the case of our “resource” post type, the WordPress hierarchy (as of 3.1) is as follows:
- single-resource.php - WordPress will check the theme folder for a file named single-resource.php, if it exists, it will use that file to display the content. For different post types, simple replace “resource” with the name of your custom post type.
- single.php - If no post type specific template is found, the default single.php is used. This is what you probably saw if you did an early preview.
- index.php - If no single template is found, WordPress defaults to the old standby - the index.
I’ll be using minimal examples for each of the templates, modified to work with Twenty Ten. Each example will replace and build on the previous example. Expand to your heart’s content or copy the essentials into your own theme.
To get started with our example, create a file called single-resource.php and upload it to your theme folder. Add the following code:
<?php get_header(); ?>

  <div id="container">
    <div id="content">
    <?php if ( have_posts() ) while ( have_posts() ) : the_post(); ?>

      <div class="resource">
        <h1 class="entry-title"><?php the_title(); ?></h1>
        <div class="entry-content">
          <?php the_content();?>
        </div>
      </div>

    <?php endwhile; ?>
    </div>
  </div>

<?php get_sidebar(); ?>
<?php get_footer(); ?>
The code above will give you a rather unexciting, but working template that will display the title and content (drawn directly from the main editor). What about our custom fields? Let’s add them in next.
Replace the code in single-resource.php with the following:
<?php get_header(); ?>

<?php // Let's get the data we need
  $recording_date = get_post_meta( $post->ID, 'recording_date', true );
  $recording_length = get_post_meta( $post->ID, 'recording_length', true );
?>

  <div id="container">
    <div id="content">
    <?php if ( have_posts() ) while ( have_posts() ) : the_post(); ?>

      <div class="resource">
        <h1 class="entry-title"><?php the_title(); ?></h1>
        <div class="entry-meta">
          <span>Recorded: <?php echo $recording_date ?> | </span>
          <span>Duration: <?php echo $recording_length ?> </span>
        </div>
        <div class="entry-content">
          <?php the_content();?>
        </div>
      </div>

    <?php endwhile; ?>
    </div>
  </div>

<?php get_sidebar(); ?>
<?php get_footer(); ?>
We’re making progress! Now, using the examples above, you should see the date your resource was published and the duration of the media file.
Let’s take a look at how that works. In WordPress, data stored in custom fields can be accessed several ways. Here, we are using a function called get_post_meta. This function requires two parameters, the unique ID of the post you want to get the data from and the name of the field (its “key”) whose data you’re after. Here’s the code again:
$recording_date = get_post_meta( $post->ID, ‘recording_date’, true );
First, we set a variable with PHP - we name it “$recording_date”. Then, we use the “get_post_meta” function. Remember, it needs two parameters, ID and the “key” of the field we want. “$post->ID” tells WordPress to use the ID of the post it is currently displaying. If we wanted to target a specific post, we’d put its ID instead:
$recording_date = get_post_meta( 35, ‘recording_date’, true ); // Get the date from post 35
The next parameter is the “key”, or “name” of our custom field. Be sure you get that right. The last parameter tells the function to return the result as a single “string” - something that we can use as text in our template below. To display our data in the template, we write:
<?php echo $recording_date ?>
Ok, let’s keep going and get our custom taxonomies showing up.
Replace the code in single-resource.php with the following:
<?php get_header(); ?>

<?php // Let's get the data we need
  $recording_date = get_post_meta( $post->ID, 'recording_date', true );
  $recording_length = get_post_meta( $post->ID, 'recording_length', true );
  $resource_presenters = get_the_term_list( $post->ID, 'presenters', '', ', ', '' );
  $resource_topics = get_the_term_list( $post->ID, 'topics', '', ', ', '' );
?>

  <div id="container">
    <div id="content">
    <?php if ( have_posts() ) while ( have_posts() ) : the_post(); ?>

      <div class="resource">
        <h1 class="entry-title"><?php the_title(); ?></h1>
        <div class="entry-meta">
          <span>Recorded: <?php echo $recording_date ?> | </span>
          <span>Duration: <?php echo $recording_length ?> | </span>
          <span>Presenters: <?php echo $resource_presenters ?> | </span>
          <span>Topics: <?php echo $resource_topics ?></span>
        </div>
        <div class="entry-content">
          <?php the_content();?>
        </div>
      </div>

    <?php endwhile; ?>
    </div>
  </div>

<?php get_sidebar(); ?>
<?php get_footer(); ?>
Now we’re starting to get more dynamic. You should see your custom fields and, assuming that your custom post has “presenters” and “topics” associated with it, you should see a list of one or more custom taxonomy terms as links. If you clicked the link, you probably saw a page that didn’t look quite what you expected - we’ll get to that soon. Check out get_the_term_list on the WordPress Codex to learn more about how it works.
Adding A Media Player
Now that we have some basic data in place, it’s time to add our media player. In this example, we will be working with the JW Media Player, a highly customizable open-source solution.
Installing JW Media Player
You can access basic installation instructions here. I recommend the following steps:
- Download the player from the Longtail Video website.
- Create a folder within your theme to hold the player files - In this case, I’ve named the folder “jw”.
- Upload jwplayer.js and player.swf to the JW Player folder within your theme.
JW Player is now installed and ready to be referenced.
Now, replace the code in single-resource.php with the following:
<?php get_header(); ?>

<?php // Let's get the data we need
  $recording_date = get_post_meta( $post->ID, 'recording_date', true );
  $recording_length = get_post_meta( $post->ID, 'recording_length', true );
  $resource_presenters = get_the_term_list( $post->ID, 'presenters', '', ', ', '' );
  $resource_topics = get_the_term_list( $post->ID, 'topics', '', ', ', '' );

  $resource_video = new WP_Query( // Start a new query for our videos
  array(
    'post_parent' => $post->ID, // Get data from the current post
    'post_type' => 'attachment', // Only bring back attachments
    'post_mime_type' => 'video', // Only bring back attachments that are videos
    'posts_per_page' => '1', // Show us the first result
    'post_status' => 'inherit', // Attachments require "inherit" or "all"
    )
  );
?>

  <div id="container">
    <div id="content">
    <?php if ( have_posts() ) while ( have_posts() ) : the_post(); ?>

      <div class="resource">
        <h1 class="entry-title"><?php the_title(); ?></h1>
        <div class="entry-meta">
          <span>Recorded: <?php echo $recording_date ?> | </span>
          <span>Duration: <?php echo $recording_length ?> | </span>
          <span>Presenters: <?php echo $resource_presenters ?></span>
        </div>
        <div class="entry-content">
          <?php while ( $resource_video->have_posts() ) : $resource_video->the_post(); ?>
            <p>Video URL: <?php echo $post->guid; ?></p>
          <?php endwhile; ?>

          <?php wp_reset_postdata(); // Reset the loop ?>

          <?php the_content(); ?>
        </div>
      </div>

    <?php endwhile; ?>
    </div>
  </div>

<?php get_sidebar(); ?>
<?php get_footer(); ?>
Note: You may notice the somewhat mysterious reference to "wp_reset_postdata". We are creating a loop within a loop and, to prevent strange behavior with template tags like "the_content" (try removing "wp_reset_postdata" to see what happens), we need to run a reset after any new loops we add within the main loop. Learn more about the loop on the WordPress Codex.
Now we’re getting somewhere! If everything went as expected, you should see a direct, plain text URL to your video. That’s not very exciting (yet), but we want to make sure we are getting that far before we add in the next step - the player.
If you’re having trouble at this point, check back through your code and look for any mistakes that may have been made. If you are trying to vary widely from this example, simplify your variations and start as close to this example as you can - get that to work first then branch back out.
With the URL to our video available, we are ready to add in the player. Let’s go!
Replace the code in single-resource.php with the following:
<?php get_header(); ?>

<?php // Let's get the data we need
  $recording_date = get_post_meta( $post->ID, 'recording_date', true );
  $recording_length = get_post_meta( $post->ID, 'recording_length', true );
  $resource_presenters = get_the_term_list( $post->ID, 'presenters', '', ', ', '' );
  $resource_topics = get_the_term_list( $post->ID, 'topics', '', ', ', '' );

  $resource_video = new WP_Query( // Start a new query for our videos
  array(
    'post_parent' => $post->ID, // Get data from the current post
    'post_type' => 'attachment', // Only bring back attachments
    'post_mime_type' => 'video', // Only bring back attachments that are videos
    'posts_per_page' => '1', // Show us the first result
    'post_status' => 'inherit', // Attachments require "inherit" or "all"
    )
  );
?>

  <div id="container">
    <div id="content">
    <?php if ( have_posts() ) while ( have_posts() ) : the_post(); ?>

      <div class="resource">
        <h1 class="entry-title"><?php the_title(); ?></h1>
        <div class="entry-meta">
          <span>Recorded: <?php echo $recording_date ?> | </span>
          <span>Duration: <?php echo $recording_length ?> | </span>
          <span>Presenters: <?php echo $resource_presenters ?> | </span>
          <span>Topics: <?php echo $resource_topics ?></span>
        </div>

        <div class="entry-content">
        <?php while ( $resource_video->have_posts() ) : $resource_video->the_post(); // Check for our video ?>
          <div id="player">
            <script type="text/javascript" src="<?php bloginfo('stylesheet_directory'); ?>/jw/jwplayer.js"></script>
            <div id="mediaspace">Video player loads here.</div>
            <script type="text/javascript">
                jwplayer("mediaspace").setup({
                    flashplayer: '<?php bloginfo( 'stylesheet_directory' ); ?>/jw/player.swf',
                    file: '<?php echo $post->guid; ?>',
                    width: 640,
                    height: 360
                });
            </script>
          </div>
        <?php endwhile; ?>

        <?php wp_reset_postdata(); // Reset the loop ?>

        <?php the_content(); ?>
        </div>
      </div>

    <?php endwhile; ?>
    </div>
  </div>

<?php get_sidebar(); ?>
<?php get_footer(); ?>
Note carefully the assumptions I’m making in the code above. First, I am assuming that you are storing the JW player files in a folder called “jw” inside the WordPress theme folder of the currently activated theme. If you load the page and the player is not working (and you did have the video URL displaying in the previous step), view the source code on your page, copy the URLs that WordPress is generating to your respective JW player files (jwplayer.js and player.swf) and try accessing them in your browser to make sure each is valid. If there is a problem, update your references accordingly.
Otherwise, there you have it! Your video details and the video itself is now displaying on the page and you should see something like this:

A view of the player, complete with title, description, custom field values and custom taxonomies terms.
Note: There is a lot that you can do to customize the appearance and behavior of the JW Player. A good place to start is the JW Player Setup Wizard. Customize the player to your liking, then implement the code changes in your template accordingly.
Using Vimeo Instead
Let’s say you wanted to use Vimeo, instead of uploading the videos into WordPress. First, you need to add a custom field to store the ID of your Vimeo video. Assuming you’ve done that, and assuming that you’ve entered a valid Vimeo ID in your custom field (we named the field “vimeo_id” in our example), the following code will work:
<?php get_header(); ?>

<?php // Let's get the data we need
  $recording_date = get_post_meta( $post->ID, 'recording_date', true );
  $recording_length = get_post_meta( $post->ID, 'recording_length', true );
  $resource_presenters = get_the_term_list( $post->ID, 'presenters', '', ', ', '' );
  $resource_topics = get_the_term_list( $post->ID, 'topics', '', ', ', '' );

  $vimeo_id = get_post_meta( $post->ID, 'vimeo_id', true );
?>

  <div id="container">
    <div id="content">
    <?php if ( have_posts() ) while ( have_posts() ) : the_post(); ?>

      <div class="resource">
        <h1 class="entry-title"><?php the_title(); ?></h1>
        <div class="entry-meta">
          <span>Recorded <?php echo $recording_date ?> | </span>
          <span>Duration: <?php echo $recording_length ?> | </span>
          <span>Presenters: <?php echo $resource_presenters ?> | </span>
          <span>Topics: <?php echo $resource_topics ?></span>
        </div>

        <div class="entry-content">
          <?php if ($vimeo_id) { // Check for a video ?>
            <iframe src="http://player.vimeo.com/video/<?php echo $vimeo_id; ?>?byline=0&title=0&portrait=0" width="640" height="360" frameborder="0" class="vimeo"></iframe>
          <?php } ?>

          <?php the_content(); ?>
        </div>
      </div>

    <?php endwhile; ?>
    </div>
  </div>

<?php get_sidebar(); ?>
<?php get_footer(); ?>
We use “$vimeo_id” to retrieve and store the ID from our custom field (named “vimeo_id”, in this case) and then, in the code below, we first check to make sure the $vimeo_id field has data in it, then we use Vimeo’s iframe code (details here) to load the video.
![]()
In Vimeo’s case, the ID is a series of numbers (notice the selected text) after “vimeo.com/”.
Conclusion
And that concludes part one! You’ve learned how to setup custom post types and custom taxonomies without using plugins. You’ve also learned how to setup custom fields and display their data, along with a video player and custom taxonomy terms, within a custom post template. In part two, we’ll look at how to customize the custom taxonomy templates and make them a whole lot more useful.
The default “category” and “tag” taxonomies in WordPress offer a lot of flexibility to those with imagination and in my development experience I have seen a wide range of creative implementations. With the introduction of custom taxonomies and their growing ease of use, though, we need no longer be bound to categories and tags. With the ability to create both hierarchical and non-hierarchical taxonomies and with the introduction of several new features in WordPress 3.1, now is the time, if you’re not already, to begin putting custom taxonomies to use.#
Let’s get started!
We learned how to setup custom post types and custom taxonomies. We also learned how to build a template to check for and display media attached to custom posts. Now, we’ll learn how to use custom taxonomy templates to organize and relate our media.
Organizing Our Media - Working With Custom Taxonomy Templates
Now that we have our media displaying, it’s time to work on how it’s organized. If you tried clicking on one of the custom taxonomy terms, odds are the result weren’t very exciting. You probably saw something like this:

What we’re going to do next is create a template that allows us to customize the results and offer a page that will be more useful.
Creating A Custom Taxonomy Template
As with custom posts, the WordPress template engine has a custom taxonomy template hierarchy that it follows to determine what template it uses to display data associated with a custom taxonomy term. We’ll start with our “presenters” taxonomy. In our case, the WordPress hierarchy is as follows:
- taxonomy-presenters.php - WordPress will check the theme folder for a file named taxonomy-presenters.php. If it exists, it will use that template to display the content. For different custom taxonomies, simple replace “presenters” with the name of your custom taxonomy.
- taxonomy.php - If no custom taxonomy template is found, WordPress checks for a general taxonomy template.
- archive.php - If no general taxonomy template is used, the WordPress archive template is used.
- index.php - If no archive template is found, WordPress defaults to the old standby - the index.
Note: The WordPress template hierarchy structure also allows templates for specific terms. For instance, in a case where "Jonathan Wold" was a term in the "presenters" taxonomy, I could create a custom template called "taxonomy-presenters-jonathan-wold.php".
Non-Hierarchical Custom Taxonomy Templates
We’ll start with the non-hierarchical “presenters” custom taxonomy. As with the custom post type examples previously, I will be using minimal examples for each of the templates.
To get started with this example, create a file called taxonomy-presenters.php and upload it to your theme folder. Add the following code:
<?php get_header(); ?>

<?php // Get the data we need
   $presenter = get_term_by( 'slug', get_query_var( 'term' ), get_query_var( 'taxonomy' ) );
?>

   <div id="container">
      <div id="content" class="presenter">
         <h1 class="entry-title"><?php echo $presenter->name; ?></h1>
         <p><?php echo $presenter->description; ?></p>
      </div>
   </div>

<?php get_footer(); ?>
Previewing a term should now show you a rather empty page with the name of the term and the description (if you entered one when creating or editing the term). In my case, on Twenty Ten, accessing the term “Jonathan Wold” (/presenter/jonathan-wold) looks like this:

Before moving on, let’s review the code above to learn what it’s doing and what you can do with it.
$presenter = get_term_by( ‘slug’, get_query_var( ‘term’ ), get_query_var( ‘taxonomy’ ) );
This piece of code may seem intimidating at first, but it’s rather simple. First, we are defining a variable called $presenter. Our goal is to have that variable store everything that WordPress knows about our term.
To do that, we are using the function get_term_by. That function requires three things:
- Field - You can access a term by name, ID, or slug. In our case, we are using the slug, which is “jonathan-wold”.
- Value - We’ve told WordPress that we want to get our term data by using the “slug” field. Now, it needs a slug to retrieve data. Since we want this to be dynamic, we are using another function called get_query_var. When you access a term in WordPress (e.g. viewing a term by its permalink), a query is run in order to generate the results for that term. Using “get_query_var” allows you to intercept that query and get the data for your own use.
- Taxonomy - In addition to the term slug, WordPress also needs the taxonomy name (this is critical in cases where the same name is used across multiple taxonomies). We use “get_query_var” again to retrieve that for us.
If we wanted to access the term data for one specific term in a particular custom taxonomy, we would do it like this:
$presenter = get_term_by( ‘slug’, ‘jonathan-wold’, ‘presenters’);
In our example, we are adding code into our template telling WordPress to give us the data for the term a visitor is currently viewing. WordPress stores that data as an “object”.
To see what data is available to you in an object, add the following within your code:
<?php
   echo '<pre>';
   print_r( $presenter );
   echo '</pre>';
?>
Preview the term again and you should see a block of code that looks something like this:
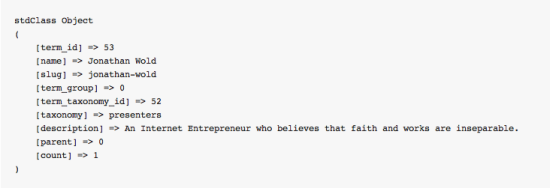
That block of code lets you see what WordPress knows about your particular object and what information you have available to use within your template.
Note: In part one, I referenced a technique for adding custom fields to your custom taxonomies and giving you access to more data within your templates. Just incase you missed the reference, take a look at the advanced tutorial, How To Add Custom Fields To Custom Taxonomies, on the Sabramedia blog.
Displaying Object Data In Templates
Now, let’s look at how we took the data from that object and actually displayed it in the template. Let’s start with the first example:
<?php echo $presenter->name; ?>
In English, we are telling PHP to “echo”, or display, the “name” value of the $presenter object. We would know that the object created with “get_term_by” contains the value for “name” by either looking up the return values for get_term_by in the Codex or by using “print_r” to see for ourselves. We’ll explore this in more detail once we look at the “topics” taxonomy.
To get our description, we do the same thing, changing the “name” value to “description”:
<?php echo $presenter->description; ?>
Displaying Term Results In Custom Taxonomy Templates
Now that we have our term name and description displaying, it’s time to show some actual custom post results.
We are continuing our example with taxonomy-presenters.php. Replace the existing code with the following:
<?php get_header(); ?>

<?php // Get the data we need
   $presenter = get_term_by( 'slug', get_query_var( 'term' ), get_query_var( 'taxonomy' ) );

   $resources = new WP_Query(
      array(
         'post_type' => 'resource', // Tell WordPress which post type we want
         'posts_per_page' => '3', // Show the first 3
         'tax_query' => array( // Return only resources where presenter is listed
            array(
               'taxonomy' => 'presenters',
               'field' => 'slug',
               'terms' => $presenter->slug,
               )
            )
         )
      );
?>

   <div id="container">
      <div id="content" class="presenter">
         <h1 class="entry-title"><?php echo $presenter->name; ?></h1>
         <p><?php echo $presenter->description; ?></p>

         <div class="resources">
            <h3>Latest Resources</h3>
            <ul id="resource-list">
               <?php while ( $resources->have_posts() ) : $resources->the_post(); ?>
                  <li id="resource-<?php the_ID(); ?>" class="resource">
                     <a href="<?php the_permalink(); ?>"><?php the_title(); ?></a>
                     <span><?php the_excerpt(); ?></span>
                  </li>
               <?php endwhile; ?>
            </ul>
         </div>

      </div>
   </div>

<?php get_footer(); ?>
Previewing one of your terms should now display the name and description of the term along with a list of custom posts associated with that term. In our case, the results look like this:

The update to this code block is the addition of our “$resources” query. Let’s take a look at that more closely:
$resources = new WP_Query(
   array(
      'post_type' => 'resource', // Tell WordPress which post type we want
      'posts_per_page' => '3', // Show the first 3
      'tax_query' => array( // Return resources associated with presenter
         array(
            'taxonomy' => 'presenters',
            'field' => 'slug',
            'terms' => $presenter->slug,
            )
         )
      )
   );
For our variable of $resources, we are creating a new instance of the WordPress class, WP_Query. Then, we’re setting values on several parameters, post_type, post_per_page, and tax_query.
The first two are straight forward. With “post_type”, you let WordPress know which types of content you’re wanting to return. We used that in our media example to retrieve attachments. To display multiple posts types, replace the “post_type” line with this:
‘post_type’ => array( ‘resource’, ‘other_post_type’, ‘another_post_type’ ),
For “posts_per_page”, you are letting WordPress know how many posts to return before triggering pagination. If you want to return all posts, use “-1” for the value, like this:
‘posts_per_page’ => ‘-1’, // Show all the posts
Now, “tax_query” is a new parameter added in WordPress 3.1. It is a powerful parameter that lets you return results associated with multiple taxonomies and custom fields.
Let’s take a closer look at it:
'tax_query' => array( // Return resources associated with presenter
   array(
      'taxonomy' => 'presenters',
      'field' => 'slug',
      'terms' => $presenter->slug,
      )
   )
First, we choose our custom taxonomy. In our case, we are hardcoding in “presenters”. If we wanted to make it more dynamic and build, for instance, a general taxonomy template (taxonomy.php) to handle multiple taxonomies in a similar way, we would use “get_query_var” again, like so:
‘taxonomy’ => get_query_var( ‘taxonomy’ ),
Note: The “tax_query” function works with one taxonomy at a time. To query multiple taxonomies, simply duplicate the code above (be sure to add the appropriate comma at the end) and change the parameters accordingly.
Next, we have the “field” parameter. This lets WordPress know what field we will be returning our terms by. WordPress accepts “slug” or “id”. I am using “slug” because I prefer recognizing posts by words over numbers.
Then, we have “terms”. In our case, we are using the $presenter variable to pass in the “slug” in the same way we added data directly into our custom post template. If we wanted to make it more dynamic, we could use “get_query_var” again:
‘term’ => get_query_var( ‘term’ ),
If we want to return results for multiple terms, we add an array, like this:
‘term’ => array( ‘term_1’, ‘term_2’, ‘random_other_term’ ),
To modify our results further, we can use an optional “operator” parameter that allows us to specify whether our results are “IN”, “NOT IN”, or “OR”. A simple example, appropriate for use in a single taxonomy, is “NOT IN”.
To modify the query to return results that are “NOT IN” the custom taxonomy and terms that you’ve listed, add the following within your tax_query array:
‘operator’ => ‘NOT IN’,
Note: To experiment with results queried against multiple custom taxonomies, take a look at “Multiple Taxonomy Handling” under Taxonomy Parameters on the Codex reference for WP_Query.
Now that we’ve gone through that, we reference our newly created query with a loop.
Here’s the code again:
<div class="resources">
   <h3>Latest Resources</h3>
   <ul id="resource-list">
      <?php while ( $resources->have_posts() ) : $resources->the_post(); ?>
         <li id="resource-<?php the_ID(); ?>" class="resource">
            <a href="<?php the_permalink(); ?>"><?php the_title(); ?></a>
            <span><?php the_excerpt(); ?></span>
         </li>
      <?php endwhile; ?>
   </ul>
</div>
This is another basic instance of The Loop, customized to return results from our $resources query and, in this case, the results returned are “the_ID”, “the_permalink”, “the_title”, and “the_excerpt”.
Checking For Empty Results
In our example above, we have some code (like the <UL>) that appears outside of our loop. If there were no results, the “container” HTML would still show up in the template. To prevent that, we can preface it with a conditional statement like this:
<?php if ( $resources->post_count > 0 ) { // Check to make sure there are resources ?>
// Display your results
<?php } ?>
Replace “$resources” with the name of your custom query and return your results within the conditional statement. If the “post_count” is greater than zero (”> 0”), then the code will appear in your template - otherwise, the page remains free of extra HTML.
Hierarchical Custom Taxonomy Templates
Alright, now that we have a non-hierarchical taxonomy under our belt, let’s move on and tackle hierarchy. We covered the basics in setting up “presenters”, so let’s pick up there where we left off.
Create a file called taxonomy-topics.php and add the following code:
<?php get_header(); ?>
<?php // Get the data we need
   $topic = get_term_by( 'slug', get_query_var( 'term' ), get_query_var( 'taxonomy' ) );

   $resources = new WP_Query(
      array(
         'post_type' => 'resource', // Tell WordPress which post type we want
         'posts_per_page' => '3', // Show the first 3
         'tax_query' => array( // Return only resources where presenter is listed
            array(
               'taxonomy' => 'topics',
               'field' => 'slug',
               'terms' => $topic->slug,
               )
            )
         )
      );
?>

   <div id="container">
      <div id="content" class="presenter">
         <h1 class="entry-title"><?php echo $topic->name; ?></h1>
         <p><?php echo $topic->description; ?></p>

         <?php if ( $resources->post_count > 0 ) { // Check to make sure there are resources ?>
            <div class="resources">
               <h3>Latest Resources</h3>
               <ul id="resource-list">
                  <?php while ($resources->have_posts()) : $resources->the_post(); ?>
                     <li id="resource-<?php the_ID(); ?>" class="resource">
                        <a href="<?php the_permalink(); ?>"><?php the_title(); ?></a>
                        <span><?php the_excerpt(); ?></span>
                     </li>
                  <?php endwhile; ?>
               </ul>
            </div>
         <?php } ?>

      </div>
   </div>

<?php get_footer(); ?>
Previewing a “topic” should now give you a familiar plain template that looks something like this:

Creating Parent and Children Links
Now, the thing that is different with this taxonomy is that it can have both “parents” and “children”. What we want to do is check for a parent topic and, if it exists, display a link to it. We also want to check for sub-topics and if they exist, display links to them.
Note: For these examples to work, be sure that you’re working with a post example that has multiple levels of a hierarchical custom taxonomy associated with it. In my example, I have created topics 3 levels deep and associated all of them with the post.
So let’s get started. First, within the PHP section at the top of our template, add the following code:
if ( $topic->parent > 0 ) { // Check to make sure the topic has a parent
   $topic_parent = get_term( $topic->parent, 'topics' ); // Get the object for the topic's parent
}

$topic_children = get_terms( 'topics', 'child_of='.$topic->term_id );
$last_topic = end( array_keys( $topic_children ) ); // Mark the last topic
Alright, what do we have going on here? First, we’re checking to make sure the topic has a parent. If a topic does not have a parent, WordPress gives the “parent” attribute a value of zero (“0”). So, the first thing we do is a conditional to check and make sure that the parent has a value greater than zero. If it does, we define the variable $topic_parent and use the get_term function to retrieve the parent topic based on its ID.
Next, we define another variable called $topic_children. This time, we use the get_terms function, which has a special attribute called “child_of”. We pass in the value of the current topic and tell WordPress, in English, to “take the current topic and bring me back a list of all its sub-topics or children”.
Then, we define a variable called $last_topic. The data that $topic_children gives us is in the form of an array. Our $last_topic variable counts to the “end” of the array and keeps track of it. We’re going to use that later to put a comma after each of our sub-topics and then do nothing for the last sub-topic.
Now, to show the results, add the following code within your template:
<?php if ( $topic->parent > 0  ) { ?>
<strong>Parent:</strong> <a href="<?php echo get_term_link( $topic_parent->slug, 'topics' ); ?>"><?php echo $topic_parent->name; ?></a>
<?php } ?>

<?php if ( $topic_children ) { ?>
   <strong>Subtopics: </strong>
   <?php foreach ( $topic_children as $key => $topic_single ) : ?>
      <span><a href="<?php echo get_term_link( $topic_single->slug, 'topics' ); ?>"><?php echo $topic_single->name; ?></a></span><?php if ( $key !== $last_topic ) echo ', '; ?>
<?php endforeach; ?>
<?php } ?>
Each block of code first checks to make sure that a parent topic or sub-topic(s) exists, respectively. Then, in the case of the “parent”, we use the get_term_link function to retrieve the link by the “slug” of the $topic_parent.
For our sub-topics, we create a “foreach” loop to output a list of all sub-topics. At the end, we do a conditional check on the $last_topic in our array using the variable we created earlier. If it is not the last topic, we echo a comma after the close <span> - otherwise, we do nothing.
And there you have it! The result using the Twenty Ten theme will look something like this:

Relating Taxonomies By Posts
Now, this is where we get a bit fancy. Let’s say we’re working on our template for the “topics” taxonomy and we wanted to show a list of “presenters” who covered that particular topic. How would we do that? In the code that follows, we’re going to use the custom posts themselves as our reference point and bring back the related custom taxonomies.
The rationale is simple. If we had 10 posts associated with a particular term in a given custom taxonomy, those 10 posts will likely have other terms from other custom taxonomies associated with them as well. So, we use the posts themselves to retrieve and compile the term data that would otherwise not be related to our particular term. Here are some examples where this might be especially useful:
- Events - An “event” taxonomy where we want to show a list of “presenters” at that same event.
- Movies - A “genre” taxonomy where we want to show a list of “directors” who make that same genre of film.
- Recipes - A “category” taxonomy where we want to show related “ingredients”.
Alright, let’s dive into the code:
// Retrieve all the IDs for resources associated with the current term
$post_ids = array();
foreach ( $resources->posts as $post ) {
   array_push( $post_ids, $post->ID );
}

// Get presenter data based on the posts associated with the current term
$presenters_by_posts = wp_get_object_terms( $post_ids, "presenters" );

$topic_presenters = array();
foreach ( $presenters_by_posts as $presenter ){
   $topic_presenters[$presenter->term_id] = $presenter;
}
$last_presenter = end( array_keys( $topic_presenters ) );
First, we define an empty array called $post_ids. Then, we create a loop through each of the “resources” associated with our current term using the $resource query we created earlier. We take that loop and “push” each of the post IDs for our resources back into the previously empty $post_ids array.
Next, we define a new variable, $presenters_by_posts. We use the wp_get_object_terms function, which accepts either a single ID or an array of IDs (which we just created) to return a list of terms. In our case, we’re using this function to check all the custom posts associated with this term and bring back a list of all the “presenters”.
Next, we define another empty array called $topic_presenters. We now loop through our $presenters_by_posts and then redefine our $presenter variable to hold the term_id of each $presenter that we returned using our $presenters_by_posts function.
Now, let’s make use of that in the template. Add the following the code:
<?php if ( $topic_presenters ) { ?>
   <strong>Presenters:</strong>
   <?php foreach ( $topic_presenters as $key => $presenter ) : ?>
      <span><a href="<?php echo get_term_link( $presenter->slug, 'presenters' ); ?>"><?php echo $presenter->name; ?></a></span><?php if ( $key !== $last_presenter ) echo ', '; ?>
   <?php endforeach; ?>
<?php } ?>
Now, we simply loop through each of our $topic_presenters using our redefined $presenter. We then access the attribute values of our $presenter object to echo the “slug” for the term link and the term “name”. Finally, we do a check for the $last_presenter and if it is not the last one, we echo a comma.
Conclusion
And that’s a wrap! With part one and part two under your belt you have taken some solid steps above and beyond the basics of WordPress theme development. My goal has been to give you some solid examples that you can follow and to explain what’s been done along the way so you can apply what you’ve learned to your own projects. You’ve learned a lot about custom post types and custom taxonomies and I am looking forward to seeing what you build.
My next area of interest is a tutorial that teaches best practices for customizing the WordPress admin and building new backend interfaces for end-users to manage these increasingly complex media sites. I’m also interested in writing about how to build the front-end filtering interface, demonstrated in the ARISE resource center. If either of those interest you, please let me know.
Credits
Though this article keeps things basic, the conclusions in part two and a lot of the techniques developed in conjunction with the projects that inspired this series would have been much more difficult without the help of the WordPress Stack Exchange community. If you have a question directly related to this post, ask it here. If you have anything else WordPress related, though, WPSE is the place to go. Also, a big thank you to Joshua, Nick, CJ, and Matt for their many hours spent reviewing, testing code samples, and providing feedback while I worked on this series.
If you have a question directly related to this post, ask it here. If you have anything else WordPress related, though, be sure to check out WPSE Also, a big thank you to all my team mates at Sabramedia for their patience with me and all their help testing and providing feedback.